{
    "type": "entry",
    "published": "2018-02-11T04:03:23+0000",
    "url": "https://cleverdevil.io/2018/another-night-with-pink-martini",
    "photo": [
        "https://cleverdevil.io/file/fa649daee40343bd38d9eeccc5721ef8/thumb.jpg"
    ],
    "syndication": [
        "https://facebook.com/10102725736863399",
        "https://twitter.com/cleverdevil/status/962537541726547968"
    ],
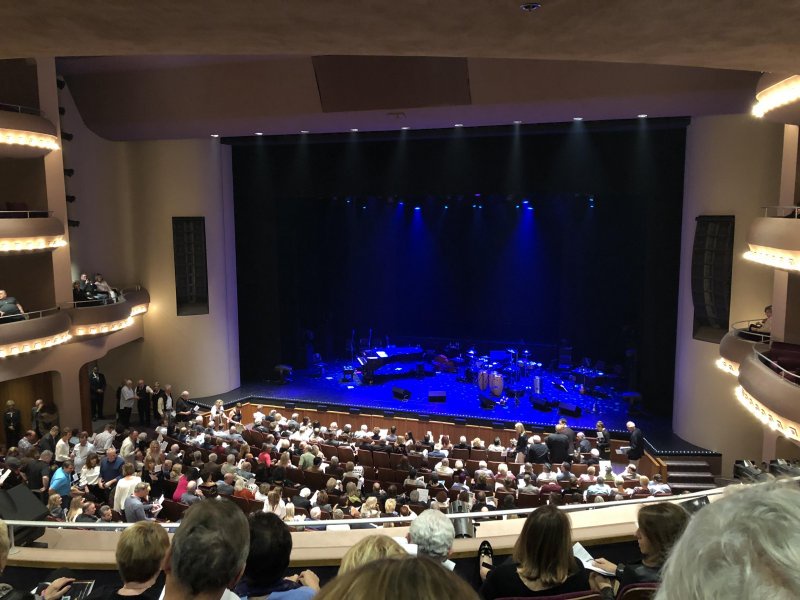
    "name": "Another night with Pink Martini \ud83c\udfb6\ud83d\udc97\ud83c\udf78",
    "author": {
        "type": "card",
        "name": "Jonathan LaCour",
        "url": "https://cleverdevil.io/profile/cleverdevil",
        "photo": "https://cleverdevil.io/file/fdbc7696a5f73864ea11a828c861e138/thumb.jpg"
    },
    "_id": "46685",
    "_source": "10"
}
{
    "type": "entry",
    "published": "2018-02-10T17:44:46+0000",
    "url": "https://cleverdevil.io/2018/hello-palm-desert",
    "photo": [
        "https://cleverdevil.io/file/ea4c28a6c3ff1ca93eadcdcf25a99ca3/thumb.jpg"
    ],
    "syndication": [
        "https://facebook.com/10102724990554009",
        "https://twitter.com/cleverdevil/status/962381869517017089"
    ],
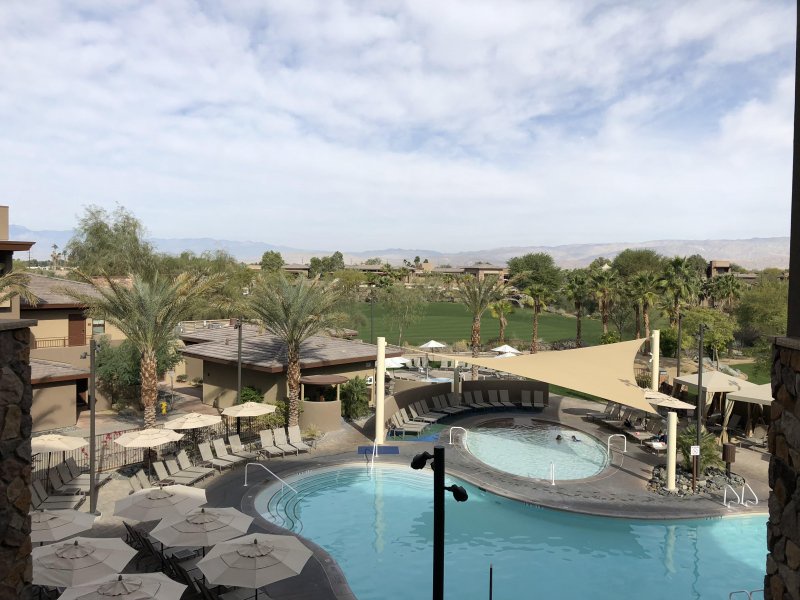
    "name": "Hello Palm Desert \ud83d\udc4b\ud83c\udffc\ud83c\udf34\ud83c\udf35",
    "author": {
        "type": "card",
        "name": "Jonathan LaCour",
        "url": "https://cleverdevil.io/profile/cleverdevil",
        "photo": "https://cleverdevil.io/file/fdbc7696a5f73864ea11a828c861e138/thumb.jpg"
    },
    "_id": "46314",
    "_source": "10"
}
{
    "type": "entry",
    "published": "2018-02-08T05:59:56+0000",
    "url": "https://cleverdevil.io/2018/ive-connected-siri-to-my-big-green-egg",
    "photo": [
        "https://cleverdevil.io/file/ef3b79ad0b158104c0638c8b59b6e11b/thumb.jpg"
    ],
    "syndication": [
        "https://facebook.com/10102722035730499",
        "https://twitter.com/cleverdevil/status/961479704933957635"
    ],
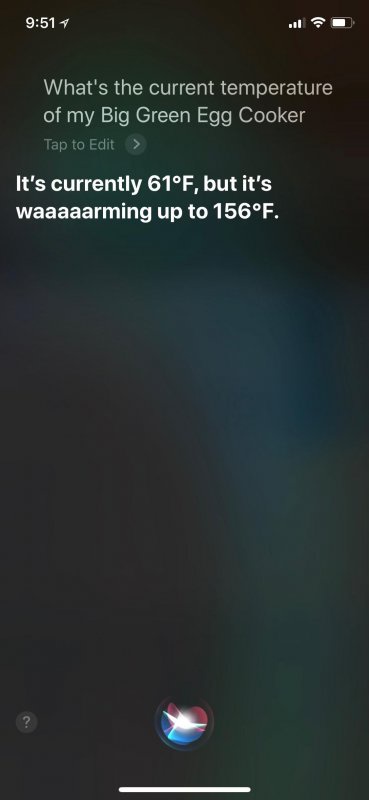
    "name": "I've connected Siri to my Big Green Egg \ud83d\udde3\ud83d\udd25",
    "author": {
        "type": "card",
        "name": "Jonathan LaCour",
        "url": "https://cleverdevil.io/profile/cleverdevil",
        "photo": "https://cleverdevil.io/file/fdbc7696a5f73864ea11a828c861e138/thumb.jpg"
    },
    "_id": "43303",
    "_source": "10"
}
{
    "type": "entry",
    "published": "2018-02-05T21:22:14+0000",
    "url": "https://cleverdevil.io/2018/spicy-pork-belly",
    "photo": [
        "https://cleverdevil.io/file/1035dd1190b3952d8047a662764f2f5c/thumb.jpg"
    ],
    "syndication": [
        "https://facebook.com/10102718997544049",
        "https://twitter.com/cleverdevil/status/960624655584329729"
    ],
    "name": "Spicy Pork Belly \ud83d\udc37\ud83c\udf36",
    "author": {
        "type": "card",
        "name": "Jonathan LaCour",
        "url": "https://cleverdevil.io/profile/cleverdevil",
        "photo": "https://cleverdevil.io/file/fdbc7696a5f73864ea11a828c861e138/thumb.jpg"
    },
    "_id": "40035",
    "_source": "10"
}
{
    "type": "entry",
    "published": "2018-02-03T07:24:23+0000",
    "url": "https://cleverdevil.io/2018/homekit-bridge-for-my-bbq-controller-lives",
    "photo": [
        "https://cleverdevil.io/file/ea071fdc4744fc998224bc5819ea837a/thumb.png"
    ],
    "syndication": [
        "https://twitter.com/cleverdevil/status/959689013245431809"
    ],
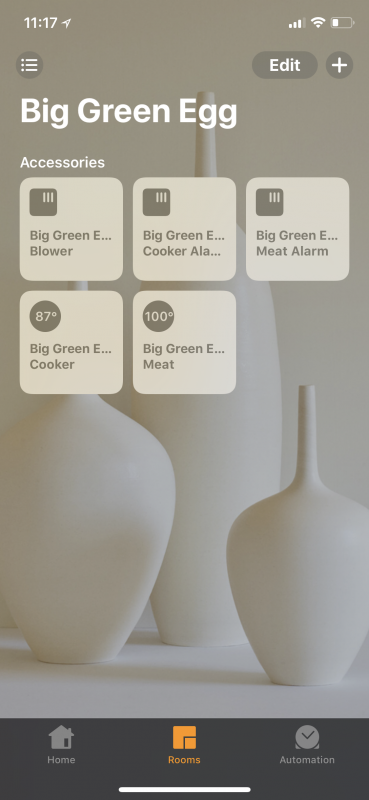
    "name": "HomeKit bridge for my BBQ Controller lives! \ud83d\udc37\ud83d\udd25\ud83e\udd16",
    "author": {
        "type": "card",
        "name": "Jonathan LaCour",
        "url": "https://cleverdevil.io/profile/cleverdevil",
        "photo": "https://cleverdevil.io/file/fdbc7696a5f73864ea11a828c861e138/thumb.jpg"
    },
    "_id": "37833",
    "_source": "10"
}
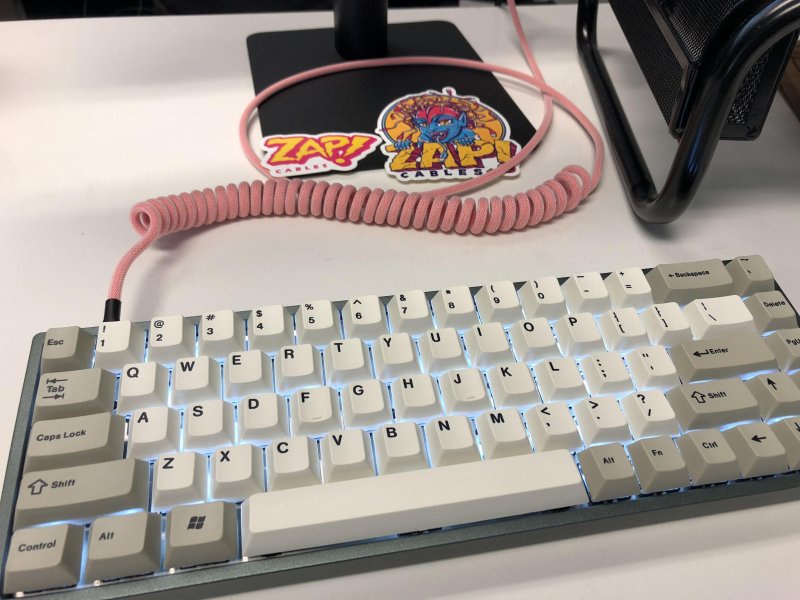
{
    "type": "entry",
    "published": "2018-02-02T21:45:40+0000",
    "url": "https://cleverdevil.io/2018/new-keyboard-cable-from-zapcables",
    "photo": [
        "https://cleverdevil.io/file/4706da773cd2b501743090459ddbf0c5/thumb.jpg"
    ],
    "syndication": [
        "https://twitter.com/cleverdevil/status/959543374108856325"
    ],
    "name": "New keyboard cable from ZapCables \u26a1\ufe0f\ud83d\udca5",
    "author": {
        "type": "card",
        "name": "Jonathan LaCour",
        "url": "https://cleverdevil.io/profile/cleverdevil",
        "photo": "https://cleverdevil.io/file/fdbc7696a5f73864ea11a828c861e138/thumb.jpg"
    },
    "_id": "37834",
    "_source": "10"
}
{
    "type": "entry",
    "published": "2018-01-28T18:00:40+0000",
    "url": "https://cleverdevil.io/2018/colette-is-seven-years-old-today",
    "photo": [
        "https://cleverdevil.io/file/440f29fc0b353fcab6110a93d4103628/thumb.jpg"
    ],
    "syndication": [
        "https://facebook.com/10102707602285239",
        "https://twitter.com/cleverdevil/status/957674827116146688"
    ],
    "name": "Colette is seven years old today!",
    "author": {
        "type": "card",
        "name": "Jonathan LaCour",
        "url": "https://cleverdevil.io/profile/cleverdevil",
        "photo": "https://cleverdevil.io/file/fdbc7696a5f73864ea11a828c861e138/thumb.jpg"
    },
    "_id": "30104",
    "_source": "10"
}

{
    "type": "entry",
    "published": "2018-01-28T16:45:55+0000",
    "url": "https://cleverdevil.io/2018/1955-jaguar-xkss",
    "syndication": [
        "https://twitter.com/cleverdevil/status/957655991717416961"
    ],
    "name": "1955 Jaguar XKSS",
    "content": {
        "text": "Season two of Amazon\u2019s The Grand Tour has been a huge improvement over the lackluster debut season. The latest episode featured the Jaguar XKSS, which was originally released in 1955, and is being rereleased this year by Jaguar. The XKSS is easily one of the best looking cars of all time.",
        "html": "<p><img src=\"https://cleverdevil.io/file/56b2ba4d94170c265628da5326c7ea55/thumb.jpg\" alt=\"\" /></p>\n<p>Season two of Amazon\u2019s <a href=\"https://en.wikipedia.org/wiki/The_Grand_Tour_(TV_series)\">The Grand Tour</a> has been a huge improvement over the lackluster debut season. The latest episode featured the Jaguar XKSS, which was originally released in 1955, and is being <a href=\"https://www.cnn.com/style/article/new-york-auto-show-jaguar-xkss/index.html\">rereleased this year</a> by Jaguar. The XKSS is easily one of the <a href=\"https://cleverdevil.io/file/b26ba988d4671b4cbe6e10d06a54d534\">best looking cars of all time</a>.</p>"
    },
    "author": {
        "type": "card",
        "name": "Jonathan LaCour",
        "url": "https://cleverdevil.io/profile/cleverdevil",
        "photo": "https://cleverdevil.io/file/fdbc7696a5f73864ea11a828c861e138/thumb.jpg"
    },
    "_id": "30105",
    "_source": "10"
}
{
    "type": "entry",
    "published": "2018-01-25T02:42:30+0000",
    "url": "https://cleverdevil.io/2018/im-totally-1337",
    "photo": [
        "https://cleverdevil.io/file/237865f68af7fc74d35e51bda72f32c1/thumb.jpg"
    ],
    "syndication": [
        "https://facebook.com/10102699852126619",
        "https://twitter.com/cleverdevil/status/956356642450427904"
    ],
    "name": "I\u2019m totally 1337",
    "author": {
        "type": "card",
        "name": "Jonathan LaCour",
        "url": "https://cleverdevil.io/profile/cleverdevil",
        "photo": "https://cleverdevil.io/file/fdbc7696a5f73864ea11a828c861e138/thumb.jpg"
    },
    "_id": "26050",
    "_source": "10"
}

{
"type": "entry",
"published": "2018-01-18T12:55:09+1000",
"url": "https://unicyclic.com/mal/2018-01-18-Urls_as_value_systems",
"syndication": [
"https://twitter.com/malcolmblaney/status/953823084892573696"
],
"name": "Urls as value systems",
"content": {
"text": "This New York Times Magazine article covers quite a few aspects of Bitcoin and it's blockchain brethren, but the ones I'm interested in are identity and token scarcity. The article has much to say on the enabling effects of the technology in this area, but I can't help but think about other, simpler, ways to do the same thing.\n\nIndieweb is all about identity, so we have that one solved. I think token scarcity could be done too... after all, we get to decide what our websites hand out. It's easy to imagine a system where urls carry value and reciprocal links validate a value relationship. And it would avoid the FOMO problem in the crypto currency world which conflates token functionality with wild speculation on the token's value. The tokens your own website hands out will never be hoarded by speculators, I promise. ;-)\n\n\nSo what does the blockchain provide that far simpler, url based systems do not? Immutability for one, link-rot is our enemy when relying on urls as a value system. But if urls had more explicit value, maybe we would put more effort into keeping them around? The blockchain is interesting, but I think it's worth asking what problems it's trying to solve and what other solutions might look like.",
"html": "<a href=\"https://www.nytimes.com/2018/01/16/magazine/beyond-the-bitcoin-bubble.html?action=click&contentCollection=undefined&region=Footer&module=WhatsNext&version=WhatsNext&contentID=WhatsNext&moduleDetail=most-emailed-0&pgtype=undefined\">This New York Times Magazine article</a> covers quite a few aspects of Bitcoin and it's blockchain brethren, but the ones I'm interested in are identity and token scarcity. The article has much to say on the enabling effects of the technology in this area, but I can't help but think about other, simpler, ways to do the same thing.<br /><br /><a href=\"https://indieweb.org\">Indieweb</a> is all about identity, so we have that one solved. I think token scarcity could be done too... after all, we get to decide what our websites hand out. It's <a href=\"https://unicyclic.com/mal/2016-06-10-credmentions_a_distributed_ledger_for_the_indieweb\">easy to imagine</a> a system where urls carry value and reciprocal links validate a value relationship. And it would avoid the FOMO problem in the crypto currency world which conflates token functionality with wild speculation on the token's value. The tokens your own website hands out will never be hoarded by speculators, I promise. ;-)<br /><br />\nSo what does the blockchain provide that far simpler, url based systems do not? Immutability for one, link-rot is our enemy when relying on urls as a value system. But if urls had more explicit value, maybe we would put more effort into keeping them around? The blockchain is interesting, but I think it's worth asking what problems it's trying to solve and what other solutions might look like.<a href=\"https://brid.gy/publish/twitter\"></a><a href=\"https://twitter.com/malcolmblaney/status/953823084892573696\" class=\"u-syndication\"></a>"
},
"author": {
"type": "card",
"name": "Malcolm Blaney",
"url": "https://unicyclic.com/mal",
"photo": "https://aperture-media.p3k.io/unicyclic.com/bdad1528925264a15ecd0bdb92bdc5836d965b0d5f4db8797489eec259fa32de.png"
},
"_id": "124143",
"_source": "243"
}
{
    "type": "entry",
    "author": {
        "name": null,
        "url": "http://tinysubversions.com/",
        "photo": null
    },
    "url": "https://twitter.com/isyourchild",
    "published": "2018-01-05T00:00:00+00:00",
    "content": {
        "html": "<p>An attempt to programmatically assassinate the \"is your child texting about...\" joke meme. (<a href=\"https://twitter.com/isyourchild\">full item here</a>)</p>",
        "text": "An attempt to programmatically assassinate the \"is your child texting about...\" joke meme. (full item here)"
    },
    "name": "[Project] Is Your Child Bot",
    "post-type": "article",
    "_id": "3903029",
    "_source": "2776"
}
{
    "type": "entry",
    "author": {
        "name": null,
        "url": "http://tinysubversions.com/",
        "photo": null
    },
    "url": "https://twitter.com/all_i_crave_bot",
    "published": "2017-12-15T00:00:00+00:00",
    "content": {
        "html": "<p>Born on a laptop, raised in a cave, tweeting and bleating is all I crave. (<a href=\"https://twitter.com/all_i_crave_bot\">full item here</a>)</p>",
        "text": "Born on a laptop, raised in a cave, tweeting and bleating is all I crave. (full item here)"
    },
    "name": "[Project] All I Crave Bot",
    "post-type": "article",
    "_id": "3903030",
    "_source": "2776"
}
{
    "type": "entry",
    "author": {
        "name": null,
        "url": "https://herestomwiththeweather.com/",
        "photo": null
    },
    "url": "https://herestomwiththeweather.com/2017/12/10/simple-indieauth-project-for-indiewebcamp-austin/",
    "published": "2017-12-10T15:59:09+00:00",
    "content": {
        "html": "<p><img src=\"https://s3.amazonaws.com/coffeebucks/800px-IndieWebCamp_Austin_2017.jpg\" alt=\"indiewebcamp group picture\" /></p>\n\n<p>Photo credit: <a href=\"https://noahread.net/\">Noah Read</a></p>\n\n<p>As expected, <a href=\"https://2017.indieweb.org/austin\">IndieWebCamp Austin</a> was great!  Demo time begins in a few minutes and I decided to add <a href=\"https://indieauth.net/\">IndieAuth</a> authentication to a test project I already had on Github named <a href=\"https://github.com/herestomwiththeweather/example_rails51_vuejs\">example_rails51_vuejs</a>.  I followed the <a href=\"https://indieauth.com/developers\">Indieauth for Developers</a> instructions and deployed the updated project to <a href=\"https://austin-indieauth-demo.herokuapp.com/\">https://austin-indieauth-demo.herokuapp.com</a></p>",
        "text": "Photo credit: Noah Read\n\nAs expected, IndieWebCamp Austin was great!  Demo time begins in a few minutes and I decided to add IndieAuth authentication to a test project I already had on Github named example_rails51_vuejs.  I followed the Indieauth for Developers instructions and deployed the updated project to https://austin-indieauth-demo.herokuapp.com"
    },
    "name": "Simple Indieauth Project for IndieWebCamp Austin",
    "_id": "124175",
    "_source": "246"
}
{
    "type": "entry",
    "author": {
        "name": null,
        "url": "http://tinysubversions.com/",
        "photo": null
    },
    "url": "https://twitter.com/BarsBot",
    "published": "2017-12-05T00:00:00+00:00",
    "content": {
        "html": "<p>A corny stream-of-consciousness rap bot. (<a href=\"https://twitter.com/BarsBot\">full item here</a>)</p>",
        "text": "A corny stream-of-consciousness rap bot. (full item here)"
    },
    "name": "[Project] Bars Bot",
    "post-type": "article",
    "_id": "3903031",
    "_source": "2776"
}
{
    "type": "entry",
    "author": {
        "name": null,
        "url": "http://tinysubversions.com/",
        "photo": null
    },
    "url": "https://twitter.com/EatenBot",
    "published": "2017-12-02T00:00:00+00:00",
    "content": {
        "html": "<p>I have eaten the memes that were in the tweets... (<a href=\"https://twitter.com/EatenBot\">full item here</a>)</p>",
        "text": "I have eaten the memes that were in the tweets... (full item here)"
    },
    "name": "[Project] Eaten Bot",
    "post-type": "article",
    "_id": "3903032",
    "_source": "2776"
}
{
    "type": "entry",
    "author": {
        "name": null,
        "url": "http://tinysubversions.com/",
        "photo": null
    },
    "url": "https://twitter.com/RapNameBot",
    "published": "2017-11-20T00:00:00+00:00",
    "content": {
        "html": "<p>An attempt to programmatically assassinate the \"your rap name is...\" joke meme. (<a href=\"https://twitter.com/RapNameBot\">full item here</a>)</p>",
        "text": "An attempt to programmatically assassinate the \"your rap name is...\" joke meme. (full item here)"
    },
    "name": "[Project] Rap Name Bot",
    "post-type": "article",
    "_id": "3903033",
    "_source": "2776"
}
{
    "type": "entry",
    "author": {
        "name": null,
        "url": "http://tinysubversions.com/",
        "photo": null
    },
    "url": "https://botsin.space/@ombra/",
    "published": "2017-10-25T00:00:00+00:00",
    "content": {
        "html": "<p>A poetry bot that liberally remixes the words of 19th century Scottish novelist Margaret Oliphant. (<a href=\"https://botsin.space/@ombra/\">full item here</a>)</p>",
        "text": "A poetry bot that liberally remixes the words of 19th century Scottish novelist Margaret Oliphant. (full item here)"
    },
    "name": "[Project] Ombra",
    "post-type": "article",
    "_id": "3903034",
    "_source": "2776"
}
{
    "type": "entry",
    "author": {
        "name": null,
        "url": "http://benjaminturner.me/blog/",
        "photo": null
    },
    "url": "http://benjaminturner.me/blog/electronics-recycling/",
    "published": "2017-07-26T03:00:00+00:00",
    "content": {
        "html": "<p>This morning I discovered a partially disassembled iMac abandoned in my building's dumpster. <a href=\"https://www.theatlantic.com/technology/archive/2016/09/the-global-cost-of-electronic-waste/502019/\">It should come as no surprise that E-waste is an increasingly important issue, and is terrible for the environment</a>. The individual who left this computer for trash acted extremely irresponsibly. What's even more frustrating is that Apple makes it trivially simple to recycle their products.</p>\n<p>You can drop off your old product at any Apple store, or if that's inconvenient, they will ship you a box for free that you can then ship back to them. If you have a newer product, they'll give you a gift card for the current value of your old product. Details are here: <a href=\"https://www.apple.com/recycling/\">https://www.apple.com/recycling/</a></p>\n<p>{{ photo:small 38 align=right }}</p>\n<p>It pains me to think of all the components of a computer leaching into a landfill, not to mention the parts that can be recycled, so I took it upon myself to remove the iMac from the garbage (thankfully it wasn't full). The nearest Apple store is only a 15 minute drive, so I gathered the disassembled pieces and carried it into the store. When I was greeted by the Apple Genius at the front of the store, I coyly asked whether they thought they could fix my computer. After a brief pause, he smiled. Several employees came over to inspect the mangled specimen I had retrieved. We posed theories as to why the owner may have bent and torn into the case when the only missing components were the RAM sticks which are easily accessible. I was thanked for rescuing the computer from the trash and we made a few jokes at the unknown owner's expense.</p>\n<p>My good deed done for the day was done, and at least one less computer went to a landfill.</p>",
        "text": "This morning I discovered a partially disassembled iMac abandoned in my building's dumpster. It should come as no surprise that E-waste is an increasingly important issue, and is terrible for the environment. The individual who left this computer for trash acted extremely irresponsibly. What's even more frustrating is that Apple makes it trivially simple to recycle their products.\nYou can drop off your old product at any Apple store, or if that's inconvenient, they will ship you a box for free that you can then ship back to them. If you have a newer product, they'll give you a gift card for the current value of your old product. Details are here: https://www.apple.com/recycling/\n{{ photo:small 38 align=right }}\nIt pains me to think of all the components of a computer leaching into a landfill, not to mention the parts that can be recycled, so I took it upon myself to remove the iMac from the garbage (thankfully it wasn't full). The nearest Apple store is only a 15 minute drive, so I gathered the disassembled pieces and carried it into the store. When I was greeted by the Apple Genius at the front of the store, I coyly asked whether they thought they could fix my computer. After a brief pause, he smiled. Several employees came over to inspect the mangled specimen I had retrieved. We posed theories as to why the owner may have bent and torn into the case when the only missing components were the RAM sticks which are easily accessible. I was thanked for rescuing the computer from the trash and we made a few jokes at the unknown owner's expense.\nMy good deed done for the day was done, and at least one less computer went to a landfill."
    },
    "name": "Electronics Recycling",
    "post-type": "article",
    "_id": "3903132",
    "_source": "2780"
}
{
"type": "entry",
"author": {
"name": null,
"url": "http://benjaminturner.me/blog/",
"photo": null
},
"url": "http://benjaminturner.me/blog/upgrading-postgres-using-pg_dumpall-on-macos/",
"published": "2017-05-28T18:29:00+00:00",
"content": {
"html": "<p>Recently, I decided to update the dependencies in my local development environment. I develop on macOS and use homebrew for package management. One of the packages I tend to neglect keeping up to date is postgresql because of the data juggling required to make the upgrade (It's actually not too difficult of a process). I've been using 9.4 and the current major version is 9.6 so it seemed like a good time to upgrade before falling even further behind. I followed the instructions on this <a href=\"https://keita.blog/2016/01/09/homebrew-and-postgresql-9-5/\">helpful blog post</a> to upgrade from 9.4 to 9.5, and everything worked exactly as outlined. However, when I tried to follow the procedure for upgrading from 9.5 to 9.6, I was met with this error:</p>\n<pre><code>$ FATAL: could not open directory \"/usr/local/share/postgresql95/timezonesets\": No such file or directory\nHINT: This may indicate an incomplete PostgreSQL installation, or that the file \"/usr/local/Cellar/postgresql95/9.5.5/bin/postgres\" has been moved away from its proper location.\n</code></pre>\n<p>The issue appears to be related to having upgraded to a newer version of postgresql before running the <code>pg_upgrade</code> command which attempts to start up the previous version of the server and fails. I tried lots of different methods switching back to the previous version of postgresql and following the procedure, but that just broke the process in a different place.</p>\n<p><a href=\"https://www.postgresql.org/docs/9.6/static/upgrading.html\">After a fair amount of googling I found a different method of upgrading using <code>pg_dumpall</code></a> which did the trick, allowing me to bypass having to start up the older version of the server. Using this process you simply create a dump file of your data, upgrade postgres and initialize a new database, then import your dump file into the new database.</p>\n<p>Create the dump file:</p>\n<pre><code>$ pg_dumpall > /path/to/file\nC&#35;when performing this step it's recommended to use the latest version of the `pg_dumpall` binary. If you haven't switched versions using `brew link` yet, you can use the absolute path:\nC&#35;$ /usr/local/Cellar/postgresql/9.6.1/bin/pg_dumpall > /path/to/file\n</code></pre>\n<p>Shut down the current server:</p>\n<pre><code>$ brew services stop postgresql95\n</code></pre>\n<p>Move the current data directory:</p>\n<pre><code>$ mv /usr/local/var/postgres /usr/local/var/postgresql95\n</code></pre>\n<p>Make a new data directory using the upgraded binary and start the server:</p>\n<pre><code>$ initdb /usr/local/var/postgres -E utf8\n$ brew services start postgresql\n</code></pre>\n<p>Restore from the dump file:</p>\n<pre><code>$ psql -d postgres -f /path/to/file\n</code></pre>",
"text": "Recently, I decided to update the dependencies in my local development environment. I develop on macOS and use homebrew for package management. One of the packages I tend to neglect keeping up to date is postgresql because of the data juggling required to make the upgrade (It's actually not too difficult of a process). I've been using 9.4 and the current major version is 9.6 so it seemed like a good time to upgrade before falling even further behind. I followed the instructions on this helpful blog post to upgrade from 9.4 to 9.5, and everything worked exactly as outlined. However, when I tried to follow the procedure for upgrading from 9.5 to 9.6, I was met with this error:\n$ FATAL: could not open directory \"/usr/local/share/postgresql95/timezonesets\": No such file or directory\nHINT: This may indicate an incomplete PostgreSQL installation, or that the file \"/usr/local/Cellar/postgresql95/9.5.5/bin/postgres\" has been moved away from its proper location.\n\nThe issue appears to be related to having upgraded to a newer version of postgresql before running the pg_upgrade command which attempts to start up the previous version of the server and fails. I tried lots of different methods switching back to the previous version of postgresql and following the procedure, but that just broke the process in a different place.\nAfter a fair amount of googling I found a different method of upgrading using pg_dumpall which did the trick, allowing me to bypass having to start up the older version of the server. Using this process you simply create a dump file of your data, upgrade postgres and initialize a new database, then import your dump file into the new database.\nCreate the dump file:\n$ pg_dumpall > /path/to/file\nC#when performing this step it's recommended to use the latest version of the `pg_dumpall` binary. If you haven't switched versions using `brew link` yet, you can use the absolute path:\nC#$ /usr/local/Cellar/postgresql/9.6.1/bin/pg_dumpall > /path/to/file\n\nShut down the current server:\n$ brew services stop postgresql95\n\nMove the current data directory:\n$ mv /usr/local/var/postgres /usr/local/var/postgresql95\n\nMake a new data directory using the upgraded binary and start the server:\n$ initdb /usr/local/var/postgres -E utf8\n$ brew services start postgresql\n\nRestore from the dump file:\n$ psql -d postgres -f /path/to/file"
},
"name": "Upgrading postgres using pg_dumpall on macOS",
"post-type": "article",
"_id": "3903133",
"_source": "2780"
}
{
    "type": "entry",
    "author": {
        "name": null,
        "url": "http://benjaminturner.me/blog/",
        "photo": null
    },
    "url": "http://benjaminturner.me/blog/quickly-add-a-ssl-certificate-using-cloudflare/",
    "published": "2016-06-23T07:16:00+00:00",
    "content": {
        "html": "<p>In the past adding a SSL certificate to a website has been an expensive and complicated operation, but there are many good services available today making it cheap and easy to secure a website.</p>\n<p>Using a SSL certificate with a domain allows users to access a website using an encrypted connection between the browser and a server. If you access a website from a public wifi hotspot that does not require a password, the data between your device and the wifi router can be compromised by being intercepted by someone else on the network. Accessing websites using https greatly reduces this vulneribility.</p>\n<p>A major drawback to implementing better security has unfortunately been cost. Previously on Heroku, using a certificate required the addition of a $20/mo add-on. This doesn't make a lot of sense for smaller projects or primarily static sites. In May, <a href=\"https://blog.heroku.com/archives/2016/5/18/announcing_heroku_free_ssl_beta_and_flexible_dyno_hours\">Heroku annouced a new SSL Beta</a> which makes using a certificate free. This is great news and what got me interested in figuring out how to setup a certificate on my site.</p>\n<p>Another interesting project is <a href=\"https://letsencrypt.org/\">Let's Encrypt</a> which has significantly reduced the complexity around acquiring a certificate. A command line tool is provided which distills creating a certificate down to a series of prompts asking for a little bit of information about your website. The certificate is saved to your device and you then can move it to your server or service where you're hosting your website.</p>\n<p>I set down the path of creating my own certificate using Let's Encrypt and wiring it up to my Heroku project using their SSL add-on. I hit two roadblocks, one was that while it's better than the $20/mo add-on, using the SSL Beta requires at the minimum a $7/mo Hobby account. Since I'm using this for my blog, which I try to run using free services, it felt like overkill. The other problem was that in it's current state, Let's Encrypt certificates must be renewed every three months. This means keeping everything up and running requires some vigilance or investment in automation.</p>\n<p>At this point I happend to learn about <a href=\"https://www.cloudflare.com/\">CloudFlare</a>, a free, hosted solution for SSL. Setting up your site with CloudFlare is simple, quick and easy. I was able to configure CloudFlare in several minutes without having to touch my Heroku configuration. After waiting for the DNS changes to propagate, I had a safer and more secure website.</p>\n<p>Here's what I did:</p>\n<ol><li>\n<p><a href=\"https://www.cloudflare.com/a/sign-up\">Create a free CloudFlare account</a></p>\n</li>\n<li>\n<p>Add a site. Here you'll enter a root domain, e.g., foo.com. CloudFlare will scan DNS records for the domain and find relevant information, in my case, I had A and CNAME records, benjaminturner.me and www.benjaminturner.me.</p>\n</li>\n<li>\n<p>When the scan is complete, CloudFlare will provide new Nameservers. These must be updated with your domain registrar, in my case I was using NameCheap. Log in to the registrars interface and update existing Nameservers to point to CloudFlare's.</p>\n</li>\n</ol><p>That's it. At this point, you'll just need to wait for all the DNS changes to propagate. For free accounts this can take up to 24 hours.</p>\n<h5>Troubleshooting</h5>\n<p>At this point, you'll have CloudFlare configured correctly, but your website may not be. One problem I had was an externally hosted image I was linking to on every page of my site. It was hosted on http, not https. All links on a site should use the https scheme, otherwise you won't see the nice \"lock\" icon in the browser's URL bar.</p>",
        "text": "In the past adding a SSL certificate to a website has been an expensive and complicated operation, but there are many good services available today making it cheap and easy to secure a website.\nUsing a SSL certificate with a domain allows users to access a website using an encrypted connection between the browser and a server. If you access a website from a public wifi hotspot that does not require a password, the data between your device and the wifi router can be compromised by being intercepted by someone else on the network. Accessing websites using https greatly reduces this vulneribility.\nA major drawback to implementing better security has unfortunately been cost. Previously on Heroku, using a certificate required the addition of a $20/mo add-on. This doesn't make a lot of sense for smaller projects or primarily static sites. In May, Heroku annouced a new SSL Beta which makes using a certificate free. This is great news and what got me interested in figuring out how to setup a certificate on my site.\nAnother interesting project is Let's Encrypt which has significantly reduced the complexity around acquiring a certificate. A command line tool is provided which distills creating a certificate down to a series of prompts asking for a little bit of information about your website. The certificate is saved to your device and you then can move it to your server or service where you're hosting your website.\nI set down the path of creating my own certificate using Let's Encrypt and wiring it up to my Heroku project using their SSL add-on. I hit two roadblocks, one was that while it's better than the $20/mo add-on, using the SSL Beta requires at the minimum a $7/mo Hobby account. Since I'm using this for my blog, which I try to run using free services, it felt like overkill. The other problem was that in it's current state, Let's Encrypt certificates must be renewed every three months. This means keeping everything up and running requires some vigilance or investment in automation.\nAt this point I happend to learn about CloudFlare, a free, hosted solution for SSL. Setting up your site with CloudFlare is simple, quick and easy. I was able to configure CloudFlare in several minutes without having to touch my Heroku configuration. After waiting for the DNS changes to propagate, I had a safer and more secure website.\nHere's what I did:\n\nCreate a free CloudFlare account\n\n\nAdd a site. Here you'll enter a root domain, e.g., foo.com. CloudFlare will scan DNS records for the domain and find relevant information, in my case, I had A and CNAME records, benjaminturner.me and www.benjaminturner.me.\n\n\nWhen the scan is complete, CloudFlare will provide new Nameservers. These must be updated with your domain registrar, in my case I was using NameCheap. Log in to the registrars interface and update existing Nameservers to point to CloudFlare's.\n\nThat's it. At this point, you'll just need to wait for all the DNS changes to propagate. For free accounts this can take up to 24 hours.\nTroubleshooting\nAt this point, you'll have CloudFlare configured correctly, but your website may not be. One problem I had was an externally hosted image I was linking to on every page of my site. It was hosted on http, not https. All links on a site should use the https scheme, otherwise you won't see the nice \"lock\" icon in the browser's URL bar."
    },
    "name": "Quickly add a SSL certificate using CloudFlare",
    "post-type": "article",
    "_id": "3903134",
    "_source": "2780"
}