I'm surprised that HTML5 support slipped through the cracks in PHP's DOM extension, but very glad Masterminds was there to cover for them. It's pretty easy to switch over and seems to be working well so far as a replacement HTML parser.
Only one quirk if you're not a composer fan, (the horror!) you need to write your own autoloader. That's fair enough given you're opting out of a controlled file system structure, and luckily it's super easy. Instead of including Mastermind's HTML5.php directly you just need your own snippet, something like:
<?php

include 'HTML5.php';

function html5_autoload($className) {
  $file = 'library/' . str_replace('\', '/', $className) . '.php';
  if (file_exists($file)) include $file;
}

spl_autoload_register('html5_autoload');
{
"type": "entry",
"published": "2018-04-06T13:54:25+10:00",
"url": "https://unicyclic.com/mal/2018-04-06-1455300078",
"category": [
"indieweb"
],
"content": {
"text": "I'm surprised that HTML5 support slipped through the cracks in PHP's DOM extension, but very glad Masterminds was there to cover for them. It's pretty easy to switch over and seems to be working well so far as a replacement HTML parser.\n\n\nOnly one quirk if you're not a composer fan, (the horror!) you need to write your own autoloader.\u00a0 That's fair enough given you're opting out of a controlled file system structure, and luckily it's super easy. Instead of including Mastermind's HTML5.php directly you just need your own snippet, something like:\n\n<?php\n\ninclude 'HTML5.php';\n\nfunction html5_autoload($className) {\n $file = 'library/' . str_replace('\\', '/', $className) . '.php';\n if (file_exists($file)) include $file;\n}\n\nspl_autoload_register('html5_autoload');",
"html": "I'm surprised that HTML5 support slipped through the cracks in PHP's DOM extension, but very glad <a href=\"https://github.com/Masterminds/html5-php\">Masterminds</a> was there to cover for them. It's pretty easy to switch over and seems to be working well so far as a replacement HTML parser.<br /><br />\nOnly one quirk if you're not a composer fan, (the horror!) you need to write your own autoloader.\u00a0 That's fair enough given you're opting out of a controlled file system structure, and luckily it's super easy. Instead of including Mastermind's HTML5.php directly you just need your own snippet, something like:\n<pre>\n<?php\n\ninclude 'HTML5.php';\n\nfunction html5_autoload($className) {\n $file = 'library/' . str_replace('\\', '/', $className) . '.php';\n if (file_exists($file)) include $file;\n}\n\nspl_autoload_register('html5_autoload');</pre>"
},
"author": {
"type": "card",
"name": "Malcolm Blaney",
"url": "https://unicyclic.com/mal",
"photo": "https://aperture-media.p3k.io/unicyclic.com/bdad1528925264a15ecd0bdb92bdc5836d965b0d5f4db8797489eec259fa32de.png"
},
"_id": "197048",
"_source": "243"
}
{
    "type": "entry",
    "author": {
        "name": null,
        "url": "http://tinysubversions.com/",
        "photo": null
    },
    "url": "https://twitter.com/choppermemebot",
    "published": "2018-04-06T00:00:00+00:00",
    "content": {
        "html": "<p>This is the \"American Chopper dialectic\" meme but with dialog snippets from the Cornell Movies-Dialog Corpus. (<a href=\"https://twitter.com/choppermemebot\">full item here</a>)</p>",
        "text": "This is the \"American Chopper dialectic\" meme but with dialog snippets from the Cornell Movies-Dialog Corpus. (full item here)"
    },
    "name": "[Project] Chopper Meme Bot",
    "post-type": "article",
    "_id": "3903025",
    "_source": "2776"
}
{
    "type": "entry",
    "published": "2018-04-04T18:02:24+00:00",
    "url": "https://cleverdevil.io/2018/werner-dropping-some-knowledge",
    "photo": [
        "https://aperture-media.p3k.io/cleverdevil.io/127699af810f86df7be0b96722519938762a2ed89dd67c2fc3994008da56a50a.jpg",
        "https://aperture-media.p3k.io/cleverdevil.io/00062afed162b1719a1a923fc758d0e4d2381d771e5bef2075424c4fc4e98d14.jpg"
    ],
    "syndication": [
        "https://twitter.com/cleverdevil/status/981592848264060929"
    ],
    "name": "@Werner dropping some knowledge",
    "author": {
        "type": "card",
        "name": "Jonathan LaCour",
        "url": "https://cleverdevil.io/profile/cleverdevil",
        "photo": "https://aperture-media.p3k.io/cleverdevil.io/abdf4969f052cb64177f73cda9be6a709931eb55607f8c1fb2c69eb135841acf.jpg"
    },
    "_id": "190976",
    "_source": "10"
}
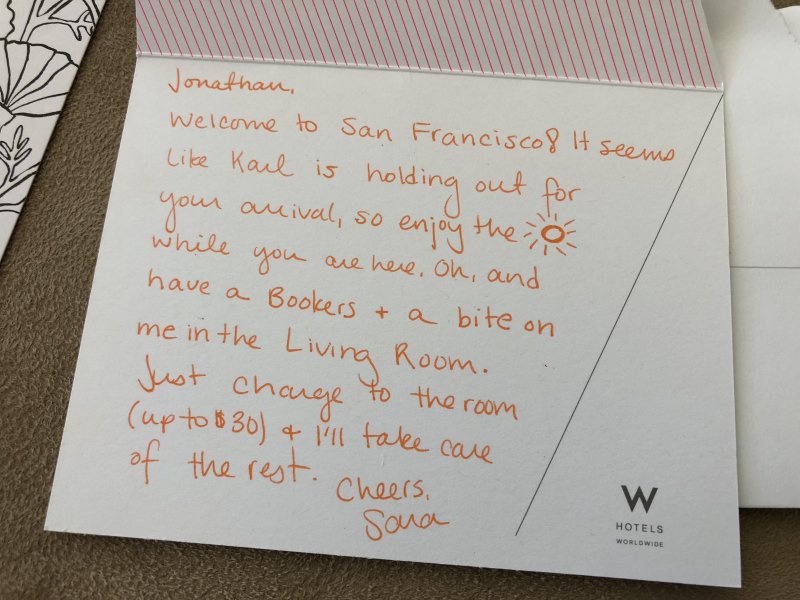
What a nice welcome to the hotel! We had a fun email exchange before my arrival, and she surprised me with some treats in my room.
{
    "type": "entry",
    "published": "2018-04-03T22:49:49+00:00",
    "url": "https://cleverdevil.io/2018/thanks-to-w-insider-sara-at-the-w-san-francisco",
    "photo": [
        "https://aperture-media.p3k.io/cleverdevil.io/a663514af11fc604eefe4c01478eaf52545181e1802f8b56c53b92316a9d7be0.jpg",
        "https://aperture-media.p3k.io/cleverdevil.io/6632d5b47f547760a59c19f43c9fb4692f25c904709270ce189dbcba4bf34212.jpg"
    ],
    "syndication": [
        "https://twitter.com/cleverdevil/status/981302789975486464"
    ],
    "content": {
        "text": "What a nice welcome to the hotel!\u00a0We had a fun email exchange before my arrival, and she surprised me with some treats in my room.\u00a0",
        "html": "<a href=\"https://cleverdevil.io/2018/thanks-to-w-insider-sara-at-the-w-san-francisco\"></a>\n            \n                    \n                <a href=\"https://cleverdevil.io/2018/thanks-to-w-insider-sara-at-the-w-san-francisco\"></a>\n            \n            <p>What a nice welcome to the hotel!\u00a0We had a fun email exchange before my arrival, and she surprised me with some treats in my room.\u00a0</p>"
    },
    "author": {
        "type": "card",
        "name": "Jonathan LaCour",
        "url": "https://cleverdevil.io/profile/cleverdevil",
        "photo": "https://aperture-media.p3k.io/cleverdevil.io/abdf4969f052cb64177f73cda9be6a709931eb55607f8c1fb2c69eb135841acf.jpg"
    },
    "_id": "188583",
    "_source": "10"
}

{
    "type": "entry",
    "published": "2018-04-01T20:22:38+00:00",
    "url": "https://cleverdevil.io/2018/happy-easter",
    "photo": [
        "https://aperture-media.p3k.io/cleverdevil.io/5ee371dd43e6aedad1e8984ac29ad0d041364f7428c5bfef7a01961dd4e68e37.jpg",
        "https://aperture-media.p3k.io/cleverdevil.io/9da9d65fff3860708f08bdfa0093d8ed4ed25c073549fb1cbfcb0a879908008c.jpg",
        "https://aperture-media.p3k.io/cleverdevil.io/dcac52ab11ea78cade6cdc497941d84b3ef86772ceaea4185daf5f3d1cae3308.jpg",
        "https://aperture-media.p3k.io/cleverdevil.io/87dee97a81b4c40e83633139c12ddd4ab66f5cf60f281de4ae473323b81998a7.jpg",
        "https://aperture-media.p3k.io/cleverdevil.io/0341c42d21d96381fd516ed70ce67f70974dc27c95444d610aac0ea64f7579e3.jpg"
    ],
    "content": {
        "text": "2 more...",
        "html": "<a href=\"https://cleverdevil.io/2018/happy-easter\"></a>\n            \n                    \n                <a href=\"https://cleverdevil.io/2018/happy-easter\"></a>\n            \n                    \n                <a href=\"https://cleverdevil.io/2018/happy-easter\"></a>\n            \n                    \n                <a href=\"https://cleverdevil.io/2018/happy-easter\"></a>\n            \n                    \n                <a href=\"https://cleverdevil.io/2018/happy-easter\"></a>\n            \n            \n        <a href=\"https://cleverdevil.io/2018/happy-easter\">2 more...</a>"
    },
    "author": {
        "type": "card",
        "name": "Jonathan LaCour",
        "url": "https://cleverdevil.io/profile/cleverdevil",
        "photo": "https://aperture-media.p3k.io/cleverdevil.io/abdf4969f052cb64177f73cda9be6a709931eb55607f8c1fb2c69eb135841acf.jpg"
    },
    "_id": "181496",
    "_source": "10"
}
{
"type": "entry",
"published": "2018-03-30T20:10:41+00:00",
"url": "https://cleverdevil.io/2018/going-serverless-with-python-wsgi-apps",
"syndication": [
"https://twitter.com/cleverdevil/status/979815338085879809"
],
"name": "Going Serverless with Python WSGI Apps",
"content": {
"text": "I've been writing web applications and services in Python since the late 1990s, and enjoy it so much that I created the Pecan web application framework way back in 2010. Configuring and deploying Python web applications, especially WSGI compliant applications, is fairly straightforward, with great WSGI servers like Gunicorn and uWSGI, and excellent Apache integration via mod_wsgi. But, for many use cases, creating and maintaining one or more cloud servers creates unnecessary cost and complexity. Security patches, kernel upgrades, SSL certificate management, and more, can be a real burden.Since the creation of AWS Lambda, \"serverless\" has become a pretty popular buzzword. Could Lambda provide a way to deploy Python WSGI applications that helps reduce cost, complexity, and management overhead? First, let's consider what serverless really means.Introducing LambdaAWS Lambda is a cloud service that lets developers deploy and run code without provisioning or managing servers. Under the hood, there is of course still a server where code is run, but its existence is largely abstracted away. Lambda, and other services in the category, are likely better defined as \"functions as a service\" (FaaS).Lambda provides built-in Python support, and invoking Lambda functions can be done manually, or via an event triggered by an another AWS service, including Amazon S3, Amazon DynamoDB, and even Amazon Alexa, just to name a few.Lambda functions can also be invoked via HTTP through the use of the Amazon API Gateway, which opens up the possibility that WSGI applications could be exposed through Lambda. That said, the complexity of setting up a WSGI application to run within a Lambda execution environment is daunting.The Serverless FrameworkEnter the Serverless Framework, a toolkit for creating, managing, deploying, and operating serverless architectures. Serverless supports AWS Lambda, and other FaaS platforms, and makes the process of getting your code deployed to Lambda much easier. Serverless is written in JavaScript, and is easily installable through npm:$ npm install serverless -gOnce installed, you can use the serverless tool from the command line to perform a whole host of tasks, such as creating new functions from templates, deploying functions to providers, and invoking functions directly.Serverless WSGIThe serverless-wsgi plugin for the Serverless Framework allows you to take any Python WSGI application, and deploy it to Lambda with ease. Let's take a look at how!I've been working on a Python-based IndieAuth implementation called PunyAuth for a few weeks, and as an infrequently accessed web service, its a perfect candidate for a FaaS-backed deployment.First, I installed the serverless-wsgi plugin:$ npm install serverless-wsgi -gThen, I created a file called punywsgi.py that exposes PunyAuth as a WSGI application:from pecan.deploy import deploy\napp = deploy('my-config.py')In order to bundle up PunyAuth and all of its dependencies, serverless-wsgi needs a requirements.txt file, which is easily done using pip:$ pip freeze > requirements.txtFinally, I created a serverless.yml file that defines the service:service: serverless-punyauth\n\nplugins:\n - serverless-wsgi\n\ncustom:\n wsgi:\n app: punywsgi.app\n\nprovider:\n name: aws\n runtime: python3.6\n region: us-east-1\n iamRoleStatements:\n - Effect: \"Allow\"\n Action:\n - s3:*\n Resource:\n - arn:aws:s3:::cleverdevil-punyauth-testing/*\n\nfunctions:\n app:\n handler: wsgi.handler\n events:\n - http: ANY /\n - http: 'ANY {proxy+}'The serverless.yml file declares a service called serverless-punyauth, enables the serverless-wsgi plugin, and directs it to expose the WSGI app defined in punywsgi.app. When using serverless-wsgi, the bundled wsgi.handler can automatically map requests and responses coming in through the Amazon API Gateway to the deployed WSGI app.In the case of PunyAuth, the function itself needs read/write access to a particular AWS S3 bucket, which is accomplished here by defining an AWS IAM role that explicitly grants this access.At this point, the application is ready to be deployed to AWS Lambda.$ serverless deploy\nServerless: Packaging Python WSGI handler...\nServerless: Packaging required Python packages...\nServerless: Linking required Python packages...\nServerless: Packaging service...\nServerless: Excluding development dependencies...\nServerless: Unlinking required Python packages...\nServerless: Uploading CloudFormation file to S3...\nServerless: Uploading artifacts...\nServerless: Uploading service .zip file to S3 (2.08 MB)...\nServerless: Validating template...\nServerless: Updating Stack...\nServerless: Checking Stack update progress...\n................\nServerless: Stack update finished...\nService Information\nservice: serverless-punyauth\nstage: dev\nregion: us-east-1\nstack: serverless-punyauth-dev\napi keys:\n None\nendpoints:\n ANY - https://rpmchol040.execute-api.us-east-1.amazonaws.com/dev\n ANY - https://rpmchol040.execute-api.us-east-1.amazonaws.com/dev/{proxy+}\nfunctions:\n app: serverless-punyauth-dev-app\nServerless: Removing old service versions...Tada! We've deployed PunyAuth as a Lambda function!Use Cases and BenefitsDeploying WSGI applications on Lambda is certainly cool, but its also not appropriate for all use cases. Typically, WSGI applications are deployed in always-running WSGI servers. With Lambda, the behind-the-scenes server that represents the environment for your application is magically started and stopped on an as-needed basis, and the application itself will need to be loaded during the function invokation on-demand. This adds some additional overhead, so in the case of high-performance or frequently-accessed applications, you'll likely want to go another route.That said, for applications like PunyAuth, where performance isn't super critical, and the application is accessed relatively infrequently, this approach has a multitude of benefits.Benefit: CostDeploying a Python WSGI application the traditional way, with always-on infrastructure, will certainly result in higher performance, but also in significantly higher cost. With Lambda, you only pay for the actual execution time of your functions, rather than paying for, say, an EC2 instance that is always on. That means that hosting a low-traffic WSGI app in Lambda could cost you pennies a month.Benefit: ManagementWhile servers have certainly become easier to manage over the years, and managed hosting providers exist that will handle operating system updates and security patches, there's no question that deploying to Lambda will reduce your management overhead. The Lambda execution environment is entirely managed by Amazon, allowing you to focus on your application code, rather than on managing a fleet of servers.Benefit: SecurityWith AWS handling the heavy lifting of keeping the execution environment up-to-date with security patches, and the ability to apply fine-grained controls using AWS IAM roles, keeping your application secure is a bit easier.ConclusionAWS Lambda and the Serverless Framework provide a whole new way to host Python WSGI applications that can help reduce cost, eliminate management, and improve security.",
"html": "<p>I've been writing web applications and services in <a href=\"http://www.python.org\">Python</a> since the late 1990s, and enjoy it so much that I created the <a href=\"https://github.com/pecan/pecan\">Pecan web application framework</a> way back in 2010. Configuring and deploying Python web applications, especially <a href=\"http://wsgi.readthedocs.io/en/latest/\">WSGI</a> compliant applications, is fairly straightforward, with great WSGI servers like <a href=\"http://gunicorn.org\">Gunicorn</a> and <a href=\"http://projects.unbit.it/uwsgi\">uWSGI</a>, and excellent Apache integration via <a href=\"http://www.modwsgi.org/\">mod_wsgi</a>. But, for many use cases, creating and maintaining one or more cloud servers creates unnecessary cost and complexity. Security patches, kernel upgrades, SSL certificate management, and more, can be a real burden.</p><p>Since the creation of AWS <a href=\"https://aws.amazon.com/lambda/\">Lambda</a>, \"serverless\" has become a pretty popular buzzword. Could Lambda provide a way to deploy Python WSGI applications that helps reduce cost, complexity, and management overhead? First, let's consider what serverless really means.</p><h2>Introducing Lambda</h2><p>AWS Lambda is a cloud service that lets developers deploy and run code without provisioning or managing servers. Under the hood, there is of course still a server where code is run, but its existence is largely abstracted away. Lambda, and other services in the category, are likely better defined as \"functions as a service\" (FaaS).</p><p>Lambda provides <a href=\"https://docs.aws.amazon.com/lambda/latest/dg/current-supported-versions.html\">built-in Python support</a>, and <a href=\"https://docs.aws.amazon.com/lambda/latest/dg/invoking-lambda-functions.html\">invoking Lambda functions</a> can be done manually, or via an event triggered by an another AWS service, including <a href=\"https://docs.aws.amazon.com/lambda/latest/dg/invoking-lambda-function.html#supported-event-source-s3\">Amazon S3</a>, <a href=\"https://aws.amazon.com/dynamodb/\">Amazon DynamoDB</a>, and even <a href=\"https://docs.aws.amazon.com/lambda/latest/dg/invoking-lambda-function.html#supported-event-source-echo\">Amazon Alexa</a>, just to name a few.</p><p>Lambda functions can also be invoked via HTTP through the use of the <a href=\"https://docs.aws.amazon.com/lambda/latest/dg/invoking-lambda-function.html#supported-event-source-api-gateway\">Amazon API Gateway</a>, which opens up the possibility that WSGI applications could be exposed through Lambda. That said, the complexity of setting up a WSGI application to run within a Lambda execution environment is daunting.</p><h2>The Serverless Framework</h2><p>Enter the <a href=\"https://serverless.com\">Serverless Framework</a>, a toolkit for creating, managing, deploying, and operating serverless architectures. Serverless supports AWS Lambda, and other FaaS platforms, and makes the process of getting your code deployed to Lambda much easier. Serverless is written in JavaScript, and is easily installable through <code>npm</code>:</p><pre>$ npm install serverless -g</pre><p>Once installed, you can use the <code>serverless</code> tool from the command line to perform a whole host of tasks, such as creating new functions from templates, deploying functions to providers, and invoking functions directly.</p><h2>Serverless WSGI</h2><p>The <a href=\"https://github.com/logandk/serverless-wsgi\">serverless-wsgi</a> plugin for the Serverless Framework allows you to take any Python WSGI application, and deploy it to Lambda with ease. Let's take a look at how!</p><p>I've been working on a Python-based <a href=\"https://indieweb.org/IndieAuth\">IndieAuth</a> implementation called <a href=\"https://github.com/cleverdevil/punyauth\">PunyAuth</a> for a few weeks, and as an infrequently accessed web service, its a perfect candidate for a FaaS-backed deployment.</p><p>First, I installed the <code>serverless-wsgi</code> plugin:</p><pre>$ npm install serverless-wsgi -g</pre><p>Then, I created a file called <code>punywsgi.py</code> that exposes PunyAuth as a WSGI application:</p><pre>from pecan.deploy import deploy\napp = deploy('my-config.py')</pre><p>In order to bundle up PunyAuth and all of its dependencies, serverless-wsgi needs a <code>requirements.txt</code> file, which is easily done using <code>pip</code>:</p><pre>$ pip freeze > requirements.txt</pre><p>Finally, I created a <code>serverless.yml</code> file that defines the service:</p><pre>service: serverless-punyauth\n\nplugins:\n - serverless-wsgi\n\ncustom:\n wsgi:\n app: punywsgi.app\n\nprovider:\n name: aws\n runtime: python3.6\n region: us-east-1\n iamRoleStatements:\n - Effect: \"Allow\"\n Action:\n - s3:*\n Resource:\n - arn:aws:s3:::cleverdevil-punyauth-testing/*\n\nfunctions:\n app:\n handler: wsgi.handler\n events:\n - http: ANY /\n - http: 'ANY {proxy+}'</pre><p>The <code>serverless.yml</code> file declares a service called <code>serverless-punyauth</code>, enables the <code>serverless-wsgi</code> plugin, and directs it to expose the WSGI app defined in <code>punywsgi.app</code>. When using <code>serverless-wsgi</code>, the bundled <code>wsgi.handler</code> can automatically map requests and responses coming in through the Amazon API Gateway to the deployed WSGI app.</p><p>In the case of PunyAuth, the function itself needs read/write access to a particular AWS S3 bucket, which is accomplished here by defining an AWS IAM role that explicitly grants this access.</p><p>At this point, the application is ready to be deployed to AWS Lambda.</p><pre>$ serverless deploy\nServerless: Packaging Python WSGI handler...\nServerless: Packaging required Python packages...\nServerless: Linking required Python packages...\nServerless: Packaging service...\nServerless: Excluding development dependencies...\nServerless: Unlinking required Python packages...\nServerless: Uploading CloudFormation file to S3...\nServerless: Uploading artifacts...\nServerless: Uploading service .zip file to S3 (2.08 MB)...\nServerless: Validating template...\nServerless: Updating Stack...\nServerless: Checking Stack update progress...\n................\nServerless: Stack update finished...\nService Information\nservice: serverless-punyauth\nstage: dev\nregion: us-east-1\nstack: serverless-punyauth-dev\napi keys:\n None\nendpoints:\n ANY - <a href=\"https://rpmchol040.execute-api.us-east-1.amazonaws.com/dev\">https://rpmchol040.execute-api.us-east-1.amazonaws.com/dev</a>\n ANY - <a href=\"https://rpmchol040.execute-api.us-east-1.amazonaws.com/dev/%7Bproxy+%7D\">https://rpmchol040.execute-api.us-east-1.amazonaws.com/dev/{proxy+}</a>\nfunctions:\n app: serverless-punyauth-dev-app\nServerless: Removing old service versions...</pre><p>Tada! We've deployed PunyAuth as a Lambda function!</p><h2>Use Cases and Benefits</h2><p>Deploying WSGI applications on Lambda is certainly cool, but its also not appropriate for all use cases. Typically, WSGI applications are deployed in always-running WSGI servers. With Lambda, the behind-the-scenes server that represents the environment for your application is magically started and stopped on an as-needed basis, and the application itself will need to be loaded during the function invokation on-demand. This adds some additional overhead, so in the case of high-performance or frequently-accessed applications, you'll likely want to go another route.</p><p>That said, for applications like PunyAuth, where performance isn't super critical, and the application is accessed relatively infrequently, this approach has a multitude of benefits.</p><h3>Benefit: Cost</h3><p>Deploying a Python WSGI application the traditional way, with always-on infrastructure, will certainly result in higher performance, but also in significantly higher cost. With Lambda, you only pay for the actual execution time of your functions, rather than paying for, say, an EC2 instance that is always on. That means that hosting a low-traffic WSGI app in Lambda could cost you pennies a month.</p><h3>Benefit: Management</h3><p>While servers have certainly become easier to manage over the years, and managed hosting providers exist that will handle operating system updates and security patches, there's no question that deploying to Lambda will reduce your management overhead. The Lambda execution environment is entirely managed by Amazon, allowing you to focus on your application code, rather than on managing a fleet of servers.</p><h3>Benefit: Security</h3><p>With AWS handling the heavy lifting of keeping the execution environment up-to-date with security patches, and the ability to apply fine-grained controls using AWS IAM roles, keeping your application secure is a bit easier.</p><h2>Conclusion</h2><p>AWS Lambda and the Serverless Framework provide a whole new way to host Python WSGI applications that can help reduce cost, eliminate management, and improve security.</p>"
},
"author": {
"type": "card",
"name": "Jonathan LaCour",
"url": "https://cleverdevil.io/profile/cleverdevil",
"photo": "https://aperture-media.p3k.io/cleverdevil.io/abdf4969f052cb64177f73cda9be6a709931eb55607f8c1fb2c69eb135841acf.jpg"
},
"_id": "175949",
"_source": "10"
}
{
    "type": "entry",
    "published": "2018-03-30T02:42:08+00:00",
    "url": "https://cleverdevil.io/2018/sous-vide-swordfish-steaks",
    "photo": [
        "https://aperture-media.p3k.io/cleverdevil.io/15b0d6101b5bd6ddee40f077b9e972c93cc0fde136fb4c4840f298317e274bde.jpg"
    ],
    "syndication": [
        "https://twitter.com/cleverdevil/status/979549315898249216"
    ],
    "name": "Sous Vide Swordfish Steaks \u2694\ufe0f\ud83d\udc1f",
    "author": {
        "type": "card",
        "name": "Jonathan LaCour",
        "url": "https://cleverdevil.io/profile/cleverdevil",
        "photo": "https://aperture-media.p3k.io/cleverdevil.io/abdf4969f052cb64177f73cda9be6a709931eb55607f8c1fb2c69eb135841acf.jpg"
    },
    "_id": "173688",
    "_source": "10"
}
{
    "type": "entry",
    "author": {
        "name": null,
        "url": "http://tinysubversions.com/",
        "photo": null
    },
    "url": "https://twitter.com/bracketmemebot",
    "published": "2018-03-28T00:00:00+00:00",
    "content": {
        "html": "<p>Making arbitrary brackets, sourced from Wikipedia (<a href=\"https://twitter.com/bracketmemebot\">full item here</a>)</p>",
        "text": "Making arbitrary brackets, sourced from Wikipedia (full item here)"
    },
    "name": "[Project] Bracket Meme Bot",
    "post-type": "article",
    "_id": "3903026",
    "_source": "2776"
}
{
    "type": "entry",
    "author": {
        "name": null,
        "url": "http://tinysubversions.com/",
        "photo": null
    },
    "url": "https://tinysubversions.com/notes/bracket-meme-bot/",
    "published": "2018-03-28T00:00:00+00:00",
    "content": {
        "html": "<p>How I came up with the algorithm and some of the important decisions I had to make along the way. (<a href=\"https://tinysubversions.com/notes/bracket-meme-bot/\">full item here</a>)</p>",
        "text": "How I came up with the algorithm and some of the important decisions I had to make along the way. (full item here)"
    },
    "name": "[Notes] How I made Bracket Meme Bot",
    "post-type": "article",
    "_id": "3903027",
    "_source": "2776"
}
{
    "type": "entry",
    "published": "2018-03-25T18:30:39+00:00",
    "url": "https://cleverdevil.io/2018/waiting--1",
    "photo": [
        "https://aperture-media.p3k.io/cleverdevil.io/35b659b328ef44c89a518d14cb1d89878cfe759ddbef55aefc0aa30b0aba4df0.jpg"
    ],
    "syndication": [
        "https://twitter.com/cleverdevil/status/977976078961606657"
    ],
    "name": "Waiting \ud83d\udc87\ud83c\udffc\u200d\u2642\ufe0f\ud83d\udc88",
    "author": {
        "type": "card",
        "name": "Jonathan LaCour",
        "url": "https://cleverdevil.io/profile/cleverdevil",
        "photo": "https://aperture-media.p3k.io/cleverdevil.io/abdf4969f052cb64177f73cda9be6a709931eb55607f8c1fb2c69eb135841acf.jpg"
    },
    "_id": "159524",
    "_source": "10"
}
{
    "type": "entry",
    "published": "2018-03-23T17:04:26+00:00",
    "url": "https://cleverdevil.io/2018/keto-friendly-instant-pot-thai-chicken-curry",
    "author": {
        "type": "card",
        "name": "Jonathan LaCour",
        "url": "https://cleverdevil.io/profile/cleverdevil",
        "photo": "https://aperture-media.p3k.io/cleverdevil.io/abdf4969f052cb64177f73cda9be6a709931eb55607f8c1fb2c69eb135841acf.jpg"
    },
    "_id": "157449",
    "_source": "10"
}
{
    "type": "entry",
    "published": "2018-03-19T04:32:57+00:00",
    "url": "https://cleverdevil.io/2018/throwback",
    "photo": [
        "https://aperture-media.p3k.io/cleverdevil.io/cdfb0578c45e254ba5f47e9974c8324f7f1fbcce1ff05fca1059e77bb9172455.jpg"
    ],
    "syndication": [
        "https://twitter.com/cleverdevil/status/975590932207849473"
    ],
    "name": "Throwback",
    "author": {
        "type": "card",
        "name": "Jonathan LaCour",
        "url": "https://cleverdevil.io/profile/cleverdevil",
        "photo": "https://aperture-media.p3k.io/cleverdevil.io/abdf4969f052cb64177f73cda9be6a709931eb55607f8c1fb2c69eb135841acf.jpg"
    },
    "_id": "148422",
    "_source": "10"
}
{
    "type": "entry",
    "author": {
        "name": null,
        "url": "http://tinysubversions.com/",
        "photo": null
    },
    "url": "https://twitter.com/MovieMemeBot",
    "published": "2018-03-19T00:00:00+00:00",
    "content": {
        "html": "<p>Everyone loves the movie meme. This bot automates it. Poorly. (<a href=\"https://twitter.com/MovieMemeBot\">full item here</a>)</p>",
        "text": "Everyone loves the movie meme. This bot automates it. Poorly. (full item here)"
    },
    "name": "[Project] Movie Meme Bot",
    "post-type": "article",
    "_id": "3903028",
    "_source": "2776"
}
{
    "type": "entry",
    "published": "2018-03-15T04:56:44+00:00",
    "url": "https://cleverdevil.io/2018/-2",
    "photo": [
        "https://aperture-media.p3k.io/cleverdevil.io/19fc647a431066cc6c444e4e6e96f04b14e0668ddf1bdd023793021bffbecc84.jpg"
    ],
    "syndication": [
        "https://twitter.com/cleverdevil/status/974147370165456898"
    ],
    "name": "\ud83c\udf54+\ud83e\udd5a+\ud83e\udd53=\ud83e\udd29",
    "author": {
        "type": "card",
        "name": "Jonathan LaCour",
        "url": "https://cleverdevil.io/profile/cleverdevil",
        "photo": "https://aperture-media.p3k.io/cleverdevil.io/abdf4969f052cb64177f73cda9be6a709931eb55607f8c1fb2c69eb135841acf.jpg"
    },
    "_id": "135813",
    "_source": "10"
}
{
    "type": "entry",
    "published": "2018-03-07T03:58:41+0000",
    "url": "https://cleverdevil.io/2018/william-became-undie-man-and-ate-pizza",
    "syndication": [
        "https://twitter.com/cleverdevil/status/971233752453124096"
    ],
    "name": "William Became \u201cUndie Man\u201d and Ate Pizza",
    "author": {
        "type": "card",
        "name": "Jonathan LaCour",
        "url": "https://cleverdevil.io/profile/cleverdevil",
        "photo": "https://cleverdevil.io/file/fdbc7696a5f73864ea11a828c861e138/thumb.jpg"
    },
    "_id": "109499",
    "_source": "10"
}

{
    "type": "entry",
    "published": "2018-03-05T01:43:51+0000",
    "url": "https://cleverdevil.io/2018/freeing-myself-from-facebook",
    "syndication": [
        "https://facebook.com/10101416927213429/posts/10102754557751109",
        "https://twitter.com/cleverdevil/status/970475617220222976"
    ],
    "name": "Freeing Myself from Facebook",
    "content": {
        "text": "Ever since my discovery of the IndieWeb movement, I've wanted to free myself from Facebook (and Instagram) and their brand of surveillance capitalism. I want to own my own data, and be in control of how it is shared, and I don't want it to be used for advertising.\nI've had this incarnation of a personal website for a few years, and have mostly been following the POSSE publishing model, publishing most forms of content on my website, and then automatically (or manually) syndicating that content to silos like Facebook and Twitter. But, much of my content still remains trapped inside of Facebook and Instagram.\nUntil now.\nAs of March 4, 2018, I've pulled the vast majority of my Facebook content into my website, and all of my Instagram photos into my website, paving the way for me to delete myself from Facebook (and potentially Instagram) by the end of 2018. What follows is a high-level overview of how I made the move.\nFacebook\nExporting Data from Facebook\nWhile Facebook does offer an export feature, its extremely limited, only includes very low resolution versions of your photos, and is generally very difficult to process programmatically. After some research, I discovered the excellent fb-export project on GitHub. Once installed, this tool will dump a huge amount (though, not quite all) of your Facebook data into machine-readable JSON files.\nSince my website is compatible with the Micropub publishing standard, I then needed to convert this Facebook-native JSON data into microformats2 formatted JSON. Enter granary, an amazing swiss-army knife of IndieWeb by Ryan Barrett. Using granary, I whipped up a quick script that transforms the exported data into native microformats2 formatted JSON:\nhttps://gist.github.com/cleverdevil/f33530706d6e8dacd13a8bd8e8c15dba\nPublishing Liberated Data\nAt this point, I had a directory full of data ready to publish. Sort of. Unfortunately, not all of the data is easily translatable, or even desirable, to publish to my website. As a result, I created another script that let me, on a case by case basis, publish a piece of content, choose to skip it entirely, or save it to deal with later.\nhttps://gist.github.com/cleverdevil/c857695bb2de1e46686d720cad9d124c\nAfter running this script, I had a significant amount of my data copied from Facebook to my website. Huzzah!\nDealing with Photo Albums\nFacebook has a \"photo albums\" feature, and I definitely wanted to get those memories onto my website. Again, I wrote a script that processes the exported data, and selectively allows me to upload all of the photos in an album to my website via Micropub, and then drops microformats2 JSON out that I could publish later.\nhttps://gist.github.com/cleverdevil/d9c08ddc6eb2da0d060a5f6fe87ddf64\nOnce I finished processing and uploading all of the photos for the albums I wished to copy over, I ran a simple utility script I keep around to publish all of the albums as new posts to my website.\nHere are some of the results:\n\nhttps://cleverdevil.io/2015/the-lunds-visit-for-easter-and-palm-springs\n\n\nhttps://cleverdevil.io/2014/maui-2014\n\n\nhttps://cleverdevil.io/2012/hawaii-2012\n\n\nhttps://cleverdevil.io/2012/out-and-about-with-colette\n\n\nhttps://cleverdevil.io/2009/europe-trip---part-1\n\nNotice, one of these comes all the way back from 2009!\nAlmost There\nThere are still quite a few photos and other types of posts that I haven't yet been able to figure out how to migrate. Notably, Facebook has strange special albums such as \"iOS Uploads,\" \"Mobile Uploads,\" and \"iPhoto Uploads\" that represent how the photos were uploaded, not so much a group of related photos. Unfortunately, the data contained in the export produced by fb-export isn't quite adequate to deal with these yet.\nStill, I am quite pleased with my progress so far. Time to move on to Instagram!\nInstagram\nInstagram has been slowly deteriorating as a service for years, so much so that I decided to completely stop publishing to Instagram earlier this year. It turns out, dealing with Instagram is a lot easier than Facebook when it comes to liberating your data.\nDownloading My Data\nAfter some research, I found instaLooter on GitHub, which allowed me to quickly export every single photo in its original resolution, along with nearly every bit of data I needed... except the photo captions. I ran instaLooter, and embedded the unique identifier in the filenames (which instaLooter refers to as the \"code').\nGetting Metadata and Publishing\nI wrote a script that used granary to lookup the photo metadata and publish to my website via Micropub:\nhttps://gist.github.com/cleverdevil/5bb767fd152de9b4c246d01086e91399\nNote, I used the non-JSON form of Micropub in this case, because Known's Micropub implementation doesn't properly handle JSON for photos yet.\nConclusions\nIt turns out, that with a little knowhow, and a lot of persistence, you can liberate much of your data from Facebook and Instagram. I feel well on target to my goal of leaving Facebook (and maybe Instagram) entirely.",
        "html": "<p>Ever since my discovery of the <a href=\"https://indieweb.org\">IndieWeb movement</a>, I've wanted to free myself from Facebook (and Instagram) and their brand of <a href=\"https://en.wikipedia.org/wiki/Surveillance_capitalism\">surveillance capitalism</a>. I want to own my own data, and be in control of how it is shared, and I don't want it to be used for advertising.</p>\n<p>I've had this incarnation of a personal website for a few years, and have mostly been following the <a href=\"https://indieweb.org/POSSE\">POSSE publishing model</a>, publishing most forms of content on my website, and then automatically (or manually) syndicating that content to <a href=\"https://indieweb.org/silo\">silos</a> like Facebook and Twitter. But, much of my content still remains trapped inside of Facebook and Instagram.</p>\n<p><em>Until now</em>.</p>\n<p>As of March 4, 2018, I've pulled the vast majority of my Facebook content into my website, and all of my Instagram photos into my website, paving the way for me to delete myself from Facebook (and potentially Instagram) by the end of 2018. What follows is a high-level overview of how I made the move.</p>\n<h2>Facebook</h2>\n<h3>Exporting Data from Facebook</h3>\n<p>While Facebook does offer an export feature, its extremely limited, only includes very low resolution versions of your photos, and is generally very difficult to process programmatically. After some research, I discovered the <a href=\"https://github.com/danburzo/fb-export\">excellent fb-export project</a> on GitHub. Once installed, this tool will dump a huge amount (though, not quite all) of your Facebook data into machine-readable JSON files.</p>\n<p>Since my website is compatible with the <a href=\"https://indieweb.org/Micropub\">Micropub publishing standard</a>, I then needed to convert this Facebook-native JSON data into <a href=\"http://microformats.org/wiki/microformats2\">microformats2 formatted JSON</a>. Enter <a href=\"https://github.com/snarfed/granary\">granary</a>, an amazing swiss-army knife of IndieWeb by <a href=\"https://snarfed.org\">Ryan Barrett</a>. Using granary, I whipped up a quick script that transforms the exported data into native microformats2 formatted JSON:</p>\n<p><a href=\"https://gist.github.com/cleverdevil/f33530706d6e8dacd13a8bd8e8c15dba\"></a><a href=\"https://gist.github.com/cleverdevil/f33530706d6e8dacd13a8bd8e8c15dba\">https://gist.github.com/cleverdevil/f33530706d6e8dacd13a8bd8e8c15dba</a></p>\n<h3>Publishing Liberated Data</h3>\n<p>At this point, I had a directory full of data ready to publish. Sort of. Unfortunately, not all of the data is easily translatable, or even desirable, to publish to my website. As a result, I created another script that let me, on a case by case basis, publish a piece of content, choose to skip it entirely, or save it to deal with later.</p>\n<p><a href=\"https://gist.github.com/cleverdevil/c857695bb2de1e46686d720cad9d124c\"></a><a href=\"https://gist.github.com/cleverdevil/c857695bb2de1e46686d720cad9d124c\">https://gist.github.com/cleverdevil/c857695bb2de1e46686d720cad9d124c</a></p>\n<p>After running this script, I had a significant amount of my data copied from Facebook to my website. Huzzah!</p>\n<h3>Dealing with Photo Albums</h3>\n<p>Facebook has a \"photo albums\" feature, and I definitely wanted to get those memories onto my website. Again, I wrote a script that processes the exported data, and selectively allows me to upload all of the photos in an album to my website via Micropub, and then drops microformats2 JSON out that I could publish later.</p>\n<p><a href=\"https://gist.github.com/cleverdevil/d9c08ddc6eb2da0d060a5f6fe87ddf64\"></a><a href=\"https://gist.github.com/cleverdevil/d9c08ddc6eb2da0d060a5f6fe87ddf64\">https://gist.github.com/cleverdevil/d9c08ddc6eb2da0d060a5f6fe87ddf64</a></p>\n<p>Once I finished processing and uploading all of the photos for the albums I wished to copy over, I ran a simple utility script I keep around to publish all of the albums as new posts to my website.</p>\n<p>Here are some of the results:</p>\n<ul><li>\n<a href=\"https://cleverdevil.io/2015/the-lunds-visit-for-easter-and-palm-springs\"></a><a href=\"https://cleverdevil.io/2015/the-lunds-visit-for-easter-and-palm-springs\">https://cleverdevil.io/2015/the-lunds-visit-for-easter-and-palm-springs</a>\n</li>\n<li>\n<a href=\"https://cleverdevil.io/2014/maui-2014\"></a><a href=\"https://cleverdevil.io/2014/maui-2014\">https://cleverdevil.io/2014/maui-2014</a>\n</li>\n<li>\n<a href=\"https://cleverdevil.io/2012/hawaii-2012\"></a><a href=\"https://cleverdevil.io/2012/hawaii-2012\">https://cleverdevil.io/2012/hawaii-2012</a>\n</li>\n<li>\n<a href=\"https://cleverdevil.io/2012/out-and-about-with-colette\"></a><a href=\"https://cleverdevil.io/2012/out-and-about-with-colette\">https://cleverdevil.io/2012/out-and-about-with-colette</a>\n</li>\n<li>\n<a href=\"https://cleverdevil.io/2009/europe-trip---part-1\"></a><a href=\"https://cleverdevil.io/2009/europe-trip---part-1\">https://cleverdevil.io/2009/europe-trip---part-1</a>\n</li>\n</ul><p>Notice, one of these comes all the way back from 2009!</p>\n<h3>Almost There</h3>\n<p>There are still quite a few photos and other types of posts that I haven't yet been able to figure out how to migrate. Notably, Facebook has strange special albums such as \"iOS Uploads,\" \"Mobile Uploads,\" and \"iPhoto Uploads\" that represent how the photos were uploaded, not so much a group of related photos. Unfortunately, the data contained in the export produced by fb-export isn't quite adequate to deal with these yet.</p>\n<p>Still, I am quite pleased with my progress so far. Time to move on to Instagram!</p>\n<h2>Instagram</h2>\n<p>Instagram has been slowly deteriorating as a service for years, so much so that I decided to <a href=\"https://www.instagram.com/p/Bd6HunOBMJ1/\">completely stop publishing to Instagram</a> earlier this year. It turns out, dealing with Instagram is a lot easier than Facebook when it comes to liberating your data.</p>\n<h3>Downloading My Data</h3>\n<p>After some research, I found <a href=\"https://github.com/althonos/instaLooter\">instaLooter</a> on GitHub, which allowed me to quickly export every single photo in its original resolution, along with nearly every bit of data I needed... except the photo captions. I ran instaLooter, and embedded the unique identifier in the filenames (which instaLooter refers to as the \"code').</p>\n<h3>Getting Metadata and Publishing</h3>\n<p>I wrote a script that used granary to lookup the photo metadata and publish to my website via Micropub:</p>\n<p><a href=\"https://gist.github.com/cleverdevil/5bb767fd152de9b4c246d01086e91399\"></a><a href=\"https://gist.github.com/cleverdevil/5bb767fd152de9b4c246d01086e91399\">https://gist.github.com/cleverdevil/5bb767fd152de9b4c246d01086e91399</a></p>\n<p>Note, I used the non-JSON form of Micropub in this case, because <a href=\"https://github.com/idno/Known\">Known</a>'s Micropub implementation doesn't properly handle JSON for photos yet.</p>\n<h2>Conclusions</h2>\n<p>It turns out, that with a little knowhow, and a lot of persistence, you can liberate much of your data from Facebook and Instagram. I feel well on target to my goal of leaving Facebook (and maybe Instagram) entirely.</p>"
    },
    "author": {
        "type": "card",
        "name": "Jonathan LaCour",
        "url": "https://cleverdevil.io/profile/cleverdevil",
        "photo": "https://cleverdevil.io/file/fdbc7696a5f73864ea11a828c861e138/thumb.jpg"
    },
    "_id": "102816",
    "_source": "10"
}
{
    "type": "entry",
    "published": "2018-03-03T17:04:09+0000",
    "url": "https://cleverdevil.io/2018/kiddo-concentration",
    "syndication": [
        "https://facebook.com/10101416927213429/posts/10102752621042289",
        "https://twitter.com/cleverdevil/status/969981927309697024"
    ],
    "name": "Kiddo Concentration",
    "content": {
        "text": "William and Colette have been asking for \u201chomework,\u201d since they\u2019ve heard about it from others. William is practicing his fine motor skills and Colette remains goofy.",
        "html": "<p><a href=\"https://cleverdevil.io/file/4f221f1b0b8c20bd9130878adf4e89ff\"><img src=\"https://cleverdevil.io/file/4f221f1b0b8c20bd9130878adf4e89ff\" alt=\"\" width=\"600\" height=\"600\" /></a><a href=\"https://cleverdevil.io/file/fa28e555a68d11458814c0fe45c7d516\"><img src=\"https://cleverdevil.io/file/fa28e555a68d11458814c0fe45c7d516\" alt=\"\" width=\"600\" height=\"600\" /></a><a href=\"https://cleverdevil.io/file/270468ab6c73e529c7e84171041dba6e\"><img src=\"https://cleverdevil.io/file/270468ab6c73e529c7e84171041dba6e\" alt=\"\" width=\"600\" height=\"600\" /></a></p>\n<p>William and Colette have been asking for \u201chomework,\u201d since they\u2019ve heard about it from others. William is practicing his fine motor skills and Colette remains goofy.</p>"
    },
    "author": {
        "type": "card",
        "name": "Jonathan LaCour",
        "url": "https://cleverdevil.io/profile/cleverdevil",
        "photo": "https://cleverdevil.io/file/fdbc7696a5f73864ea11a828c861e138/thumb.jpg"
    },
    "_id": "98830",
    "_source": "10"
}
{
    "type": "entry",
    "published": "2018-02-26T04:34:37+0000",
    "url": "https://cleverdevil.io/2018/special-lunch-with-william",
    "syndication": [
        "https://facebook.com/10101416927213429/posts/10102745539309139",
        "https://twitter.com/cleverdevil/status/967981428666519552"
    ],
    "name": "Special Lunch With William",
    "content": {
        "text": "Colette had rehearsal for a children\u2019s musical, so Lacey and I took William to lunch at Playa Hermosa on the Hermosa Beach Pier. Good food and lots of smiles with my sweet boy.",
        "html": "<p><a href=\"https://cleverdevil.io/file/3cb76a36a0beeb4b3b6fd3c328da42f2\"><img src=\"https://cleverdevil.io/file/3cb76a36a0beeb4b3b6fd3c328da42f2\" alt=\"\" width=\"600\" height=\"600\" /></a><a href=\"https://cleverdevil.io/file/5b14dc0db318483d16d1ee1690f76155\"><img src=\"https://cleverdevil.io/file/5b14dc0db318483d16d1ee1690f76155\" alt=\"\" width=\"600\" height=\"600\" /></a><a href=\"https://cleverdevil.io/file/4911c3e1130bec21f5421e4edad78fa4\"><img src=\"https://cleverdevil.io/file/4911c3e1130bec21f5421e4edad78fa4\" alt=\"\" width=\"600\" height=\"600\" /></a><a href=\"https://cleverdevil.io/file/d08e3073507941f726fc60fc799d354d\"><img src=\"https://cleverdevil.io/file/d08e3073507941f726fc60fc799d354d\" alt=\"\" width=\"600\" height=\"600\" /></a><a href=\"https://cleverdevil.io/file/2523d86b8377aca83847fa1b195204a6\"><img src=\"https://cleverdevil.io/file/2523d86b8377aca83847fa1b195204a6\" alt=\"\" width=\"600\" height=\"600\" /></a><a href=\"https://cleverdevil.io/file/0bed164e0fe80fa2a3337599577e73d7\"><img src=\"https://cleverdevil.io/file/0bed164e0fe80fa2a3337599577e73d7\" alt=\"\" width=\"600\" height=\"600\" /></a></p>\n<p>Colette had rehearsal for a children\u2019s musical, so Lacey and I took William to lunch at Playa Hermosa on the Hermosa Beach Pier. Good food and lots of smiles with my sweet boy.</p>"
    },
    "author": {
        "type": "card",
        "name": "Jonathan LaCour",
        "url": "https://cleverdevil.io/profile/cleverdevil",
        "photo": "https://cleverdevil.io/file/fdbc7696a5f73864ea11a828c861e138/thumb.jpg"
    },
    "_id": "84717",
    "_source": "10"
}
{
    "type": "entry",
    "published": "2018-02-17T05:48:22+0000",
    "url": "https://cleverdevil.io/2018/this-keyboard-is-finally-just-how-i-want-it",
    "photo": [
        "https://cleverdevil.io/file/eca6f77bd66a0b6b38597bfa2114d1d1/thumb.jpg"
    ],
    "syndication": [
        "https://twitter.com/cleverdevil/status/964738278124654593"
    ],
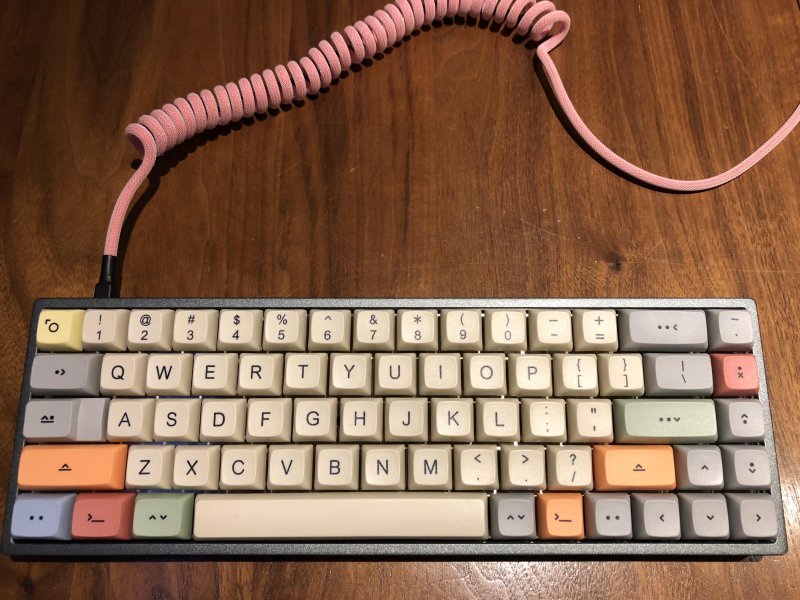
    "name": "This keyboard is finally just how I want it",
    "author": {
        "type": "card",
        "name": "Jonathan LaCour",
        "url": "https://cleverdevil.io/profile/cleverdevil",
        "photo": "https://cleverdevil.io/file/fdbc7696a5f73864ea11a828c861e138/thumb.jpg"
    },
    "_id": "56307",
    "_source": "10"
}
{
    "type": "entry",
    "published": "2018-02-15T02:31:07+0000",
    "url": "https://cleverdevil.io/2018/sassy-valentine-colette",
    "photo": [
        "https://cleverdevil.io/file/2ad59d3b1537bdbc3d3b23600864f04e/colette.gif"
    ],
    "name": "Sassy Valentine Colette \ud83d\udc95",
    "author": {
        "type": "card",
        "name": "Jonathan LaCour",
        "url": "https://cleverdevil.io/profile/cleverdevil",
        "photo": "https://cleverdevil.io/file/fdbc7696a5f73864ea11a828c861e138/thumb.jpg"
    },
    "_id": "51482",
    "_source": "10"
}