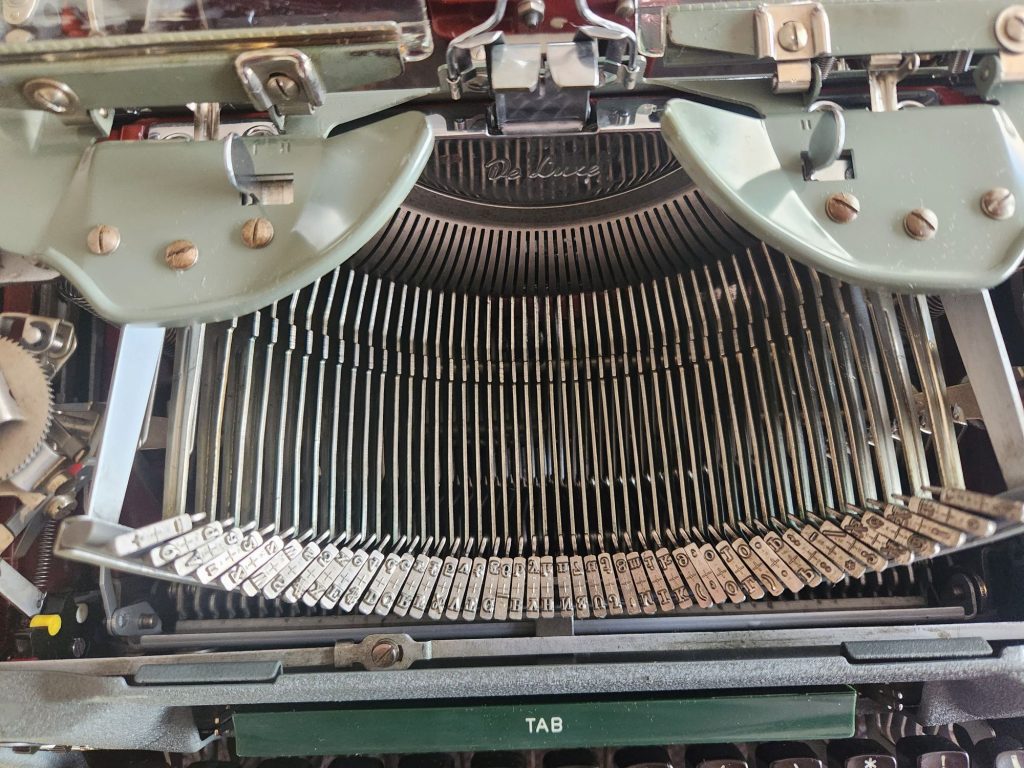
Over the weekend I stripped down my 1956 Olympia SG1 and cleaned all the body panels thoroughly. I had taken out all the old foam, but I also removed the remaining loosened felt pieces.
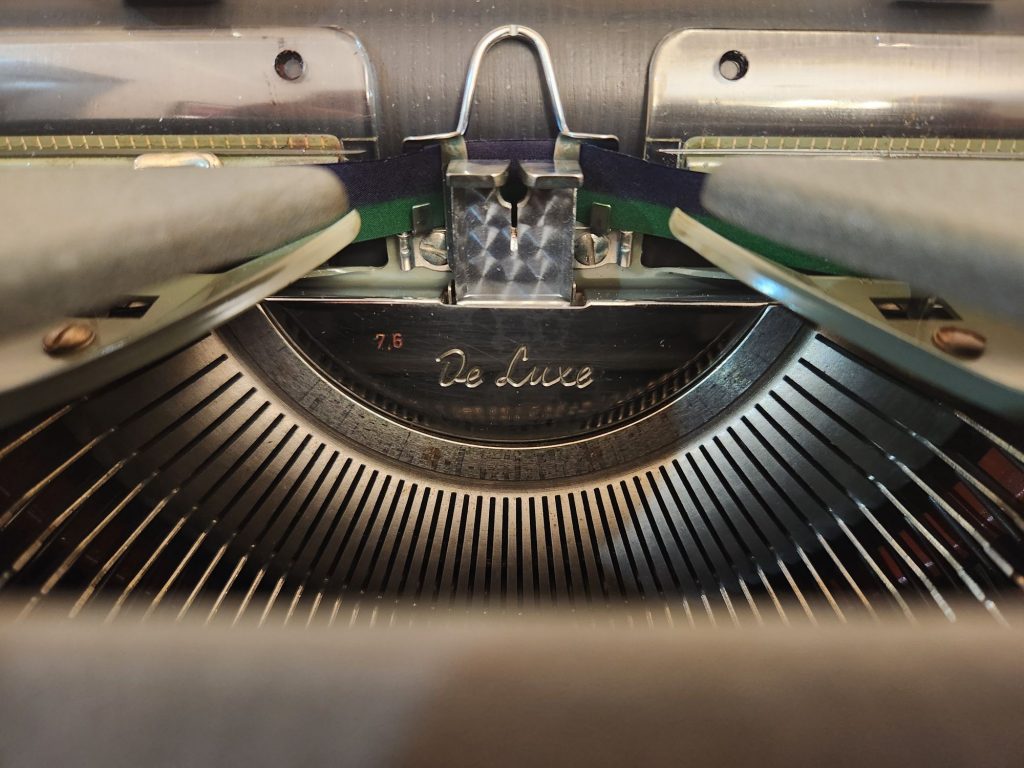
I flushed the internals out with lacquer thinner and blew everything out with the air compressor the following day. I replaced the rubber body bushings and replaced two missing washers on the feet. Then I put everything back together making the appropriate adjustments as I went.
Remaining servicing
Sometime in the near future I still need to replace the feet (they're reasonably passable), the platen (rock hard), and the felt/foam. I'll polish up the keys, chrome, and brights. I still need to polish up the keylevers and typebars which I decided not to remove and put through an ultrasonic cleaner.
It still needs a replacement set screw for the tab clear lever on the right hand side. I'll also eventually need to replace the underlying metal connection on the right hand side card guide—it's missing the connecting pin and part of the left metal arm. I've remediated most of the minimal rust, but there are a few remaining internal blemishes that could be polished up (low priority). I'll also need to weld back on the curved, flat "spring" on the left end of the bottom of the paper table that shore itself off at some point. The tabulator can also use a bit of additional love and attention.
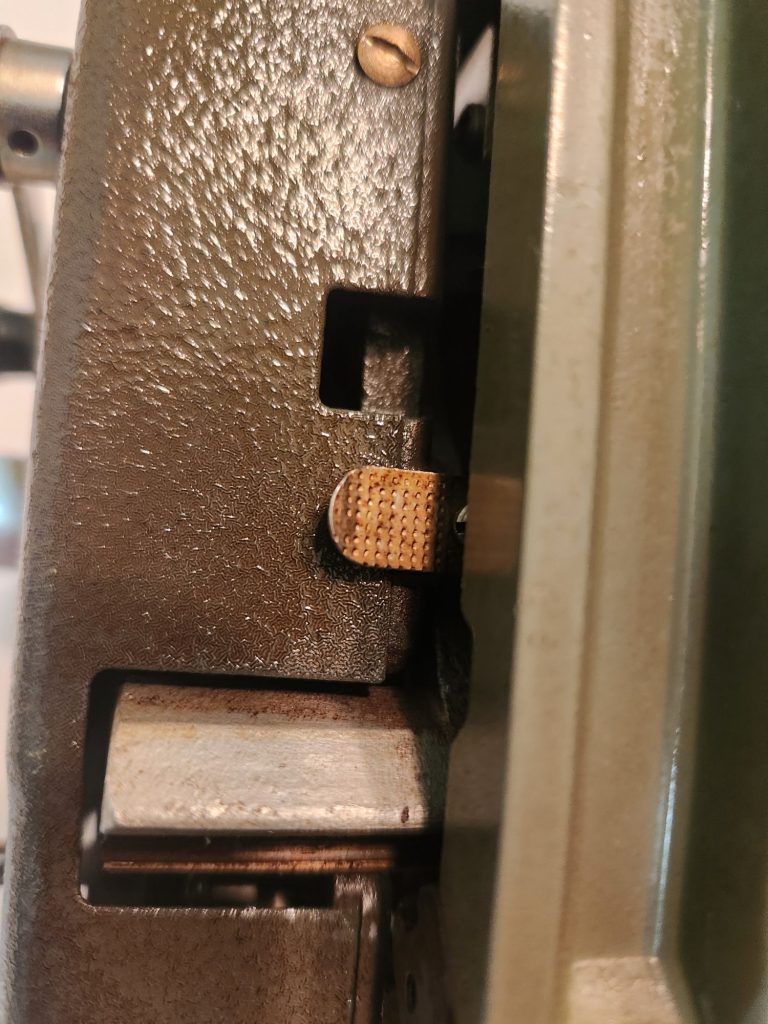
For historical purposes, I left the tiniest hint of "brown nicotine stain" on the right side of the carriage where a smoker apparently kept their ash tray. That side of the machine almost appeared to be a chimney based on the discoloration which was otherwise remediated.
Beyond this, it's ready to be in the regular rotation, but will be my primary desk machine for the near future.
{
"type": "entry",
"published": "2026-03-03T02:01:18-08:00",
"summary": "Over the weekend I stripped down my 1956 Olympia SG1 and cleaned all the body panels thoroughly. I had taken out all the old foam, but I also removed the remaining loosened felt pieces. I flushed the internals out with lacquer thinner and blew everything out with the air compressor the following day. I replaced … <a href=\"https://boffosocko.com/2026/03/03/olympia-sg1-standard-typewriter-clean-oil-and-adjust/\" class=\"more-link\">Continue reading <span class=\"screen-reader-text\">Olympia SG1 Standard Typewriter Clean, Oil, and Adjust</span></a>",
"url": "https://boffosocko.com/2026/03/03/olympia-sg1-standard-typewriter-clean-oil-and-adjust/",
"featured": "https://boffosocko.com/wp-content/uploads/2026/03/wp-17725296377261695212589185083502.jpg",
"category": [
"Typewriters",
"cigarette smoking",
"Olympia SG1",
"Olympia typewriters",
"typewriter restoration"
],
"content": {
"text": "Over the weekend I stripped down my 1956 Olympia SG1 and cleaned all the body panels thoroughly. I had taken out all the old foam, but I also removed the remaining loosened felt pieces.\n\n\n\nI flushed the internals out with lacquer thinner and blew everything out with the air compressor the following day. I replaced the rubber body bushings and replaced two missing washers on the feet. Then I put everything back together making the appropriate adjustments as I went.\u00a0\n\nRemaining servicing\n\nSometime in the near future I still need to replace the feet (they're reasonably passable), the platen (rock hard), and the felt/foam. I'll polish up the keys, chrome, and brights. I still need to polish up the keylevers and typebars which I decided not to remove and put through an ultrasonic cleaner.\n\nIt still needs a replacement set screw for the tab clear lever on the right hand side. I'll also eventually need to replace the underlying metal connection on the right hand side card guide\u2014it's missing the connecting pin and part of the left metal arm. I've remediated most of the minimal rust, but there are a few remaining internal blemishes that could be polished up (low priority). I'll also need to weld back on the curved, flat \"spring\" on the left end of the bottom of the paper table that shore itself off at some point. The tabulator can also use a bit of additional love and attention.\n\nFor historical purposes, I left the tiniest hint of \"brown nicotine stain\" on the right side of the carriage where a smoker apparently kept their ash tray. That side of the machine almost appeared to be a chimney based on the discoloration which was otherwise remediated.\n\n\n\nBeyond this, it's ready to be in the regular rotation, but will be my primary desk machine for the near future.",
"html": "Over the weekend I stripped down my <a href=\"https://boffosocko.com/2026/02/02/1956-olympia-sg1-standard-typewriter/\">1956 Olympia SG1</a> and cleaned all the body panels thoroughly. I had taken out all the old foam, but I also removed the remaining loosened felt pieces.\n\n<img src=\"https://boffosocko.com/wp-content/uploads/2026/03/wp-17725297295822999704343404140557-1024x768.jpg\" alt=\"With the hood removed we see into the basket of a 1956 Olympia SG1 typewriter\" width=\"660\" height=\"495\" />\n\nI flushed the internals out with lacquer thinner and blew everything out with the air compressor the following day. I replaced the <a href=\"https://boffosocko.com/kind/article/\">rubber body bushings</a> and replaced two missing washers on the feet. Then I put everything back together making the appropriate adjustments as I went.\u00a0\n\n<img src=\"https://boffosocko.com/wp-content/uploads/2026/03/wp-17725296507997146766100349152237-1024x768.jpg\" alt=\"View through the hood of an Olympia SG1 onto the gleaming De Luxe plate in the basket of the typewriter\" width=\"660\" height=\"495\" /><h2>Remaining servicing</h2>\n\nSometime in the near future I still need to replace the feet (they're reasonably passable), the platen (rock hard), and the felt/foam. I'll polish up the keys, chrome, and brights. I still need to polish up the keylevers and typebars which I decided not to remove and put through an ultrasonic cleaner.\n\nIt still needs a replacement set screw for the tab clear lever on the right hand side. I'll also eventually need to replace the underlying metal connection on the right hand side card guide\u2014it's missing the connecting pin and part of the left metal arm. I've remediated most of the minimal rust, but there are a few remaining internal blemishes that could be polished up (low priority). I'll also need to weld back on the curved, flat \"spring\" on the left end of the bottom of the paper table that shore itself off at some point. The tabulator can also use a bit of additional love and attention.\n\nFor historical purposes, I left the tiniest hint of \"brown nicotine stain\" on the right side of the carriage where a smoker apparently kept their ash tray. That side of the machine almost appeared to be a chimney based on the discoloration which was otherwise remediated.\n\n<img src=\"https://boffosocko.com/wp-content/uploads/2026/03/wp-17725296187584883327527894042741-768x1024.jpg\" alt=\"A view of the bottom right side of the carriage. What should have been a green crinkle painted body panel and shiny silver tab at the end of the drawband were coated with a layer of brown nicotine sludge.\" width=\"660\" height=\"880\" />\n\nBeyond this, it's ready to be in the regular rotation, but will be my primary desk machine for the near future.\n\n<img src=\"https://boffosocko.com/wp-content/uploads/2026/03/wp-17725296639202366606001339012576-1024x768.jpg\" alt=\"angle on the right side of an Olympia SG1 in green crinkle paint featuring a close up of a green plastic wheel of the touch control, gleaming chrome trim and brown plastic keys on the keyboard\" width=\"660\" height=\"495\" />"
},
"author": {
"type": "card",
"name": null,
"url": null,
"photo": null
},
"post-type": "note",
"_id": "47518683",
"_source": "2785"
}
One of my favorite features of my new site is invisible to visitors — an integrated feed reader with support for first-class IndieWeb interactions — likes, replies, bookmarks, and reposts. Still iterating on it, but it’s already lovely to use.
{
    "type": "entry",
    "published": "2026-03-03T05:03:00.418743+00:00",
    "url": "https://cleverdevil.io/2026/one-of-my-favorite-features-of-my-new-si",
    "syndication": [
        "https://cleverdevil.club/@jonathan/116163489364720178",
        "https://bsky.app/profile/cleverdevil.io/post/3mg4yj4ljvr2c"
    ],
    "content": {
        "text": "One of my favorite features of my new site is invisible to visitors \u2014 an integrated feed reader with support for first-class IndieWeb interactions \u2014 likes, replies, bookmarks, and reposts. Still iterating on it, but it\u2019s already lovely to use.",
        "html": "<p>One of my favorite features of my new site is invisible to visitors \u2014 an integrated feed reader with support for first-class IndieWeb interactions \u2014 likes, replies, bookmarks, and reposts. Still iterating on it, but it\u2019s already lovely to use.</p>"
    },
    "author": {
        "type": "card",
        "name": "Jonathan LaCour",
        "url": "https://cleverdevil.io",
        "photo": "https://cleverdevil.io/profile/photo"
    },
    "post-type": "note",
    "_id": "47516680",
    "_source": "10"
}
I really enjoyed watching Winged Migration (2001). Some breathtaking footage of bird migrations all around the world. I was shocked how close some of the footage was and learned via Wikipedia that the filmmakers raised several species from birth so they would imprint on the staff and be accustomed to the ultralights and camera equipment.
{
    "type": "entry",
    "published": "2026-03-02 12:18-0800",
    "url": "https://gregorlove.com/2026/02/i-really-enjoyed/",
    "category": [
        "movies"
    ],
    "content": {
        "text": "I really enjoyed watching Winged Migration (2001). Some breathtaking footage of bird migrations all around the world. I was shocked how close some of the footage was and learned via Wikipedia that the filmmakers raised several species from birth so they would imprint on the staff and be accustomed to the ultralights and camera equipment.\n\nThanks to Fractal Kitty for the recommendation for IndieWeb Movie Club!",
        "html": "<p>I really enjoyed watching <i><a href=\"https://en.wikipedia.org/wiki/Winged_Migration\">Winged Migration</a></i> (2001). Some breathtaking footage of bird migrations all around the world. I was shocked how close some of the footage was and learned via Wikipedia that the filmmakers raised several species from birth so they would imprint on the staff and be accustomed to the ultralights and camera equipment.</p>\n\n<p>Thanks to <a class=\"h-card\" href=\"https://banjomagpi.com/\">Fractal Kitty</a> for the <a href=\"https://banjomagpi.com/movies/winged-migration/\">recommendation</a> for IndieWeb Movie Club!</p>"
    },
    "author": {
        "type": "card",
        "name": "gRegor Morrill",
        "url": "https://gregorlove.com/",
        "photo": "https://gregorlove.com/site/assets/files/6268/profile-2021-square.300x0.jpg"
    },
    "post-type": "note",
    "_id": "47514516",
    "_source": "95"
}
Over the weekend I made a major push on beginning restoration of the Olympia SG1 standard typewriter I picked up this past month.
One of the small issues I encountered was finding four crushed rubber bushings between the exterior typewriter shell and the main chassis at the four corners on the bottom of the machine.
[caption id="attachment_55834794" align="aligncenter" width="660"] This black rubber bushing is so smashed you almost can't see it above the silver screw head at the bottom of the typewriter frame. The typewriter's foot has been removed from the vacant screw hole just to the left of the bushing screw to provide better visibility.[/caption]
This is a common repair issue for the Olympia SM3 machines and one which can dramatically impair that typewriter's functionality after several decades. I expected this would be a common enough problem, so I searched a few fora, YouTube, and some specialty Facebook Groups to see how others had done the replacement and find the specs for the original part. Sadly none were forthcoming. Has no one written this up before? Perhaps because the issue isn't a huge problem from a functional perspective, no one has bothered?
But when you're doing a thorough restoration on a machine you plan to put into daily use, you go the extra mile. To that end, I thought I'd write up a few notes for those who encounter this in the future, particularly as I couldn't find quick sources on it the way one can for the SM3.
My crushed rubber husks (now more like a brittle, friable plastic) were approximately 16mmOD x 4mm ID x 2 mm, but I wanted to do better than guessing the appropriate replacement. Fortunately our friend Richard Polt has a downloadable .pdf copy of the Olympia Spare Parts Catalog and Price List for Standard Typewriters Model SG1 (Jan. 1, 1961 edition) from the Ames Supply Company on his website. Pulling it up very quickly provided a diagram of the appropriate part on page 12 and indicated it to be part number 34280-5x.6. Scrolling ahead to page 61, one discovers that the part is called a "spacing washer (rubber)" whose original specs are listed as 5⌀12⌀x4mm which originally listed for 11¢. On a German manufactured machine this is indicating a 5mm inner diameter, 12 mm outer diameter, and thickness of 4mm.
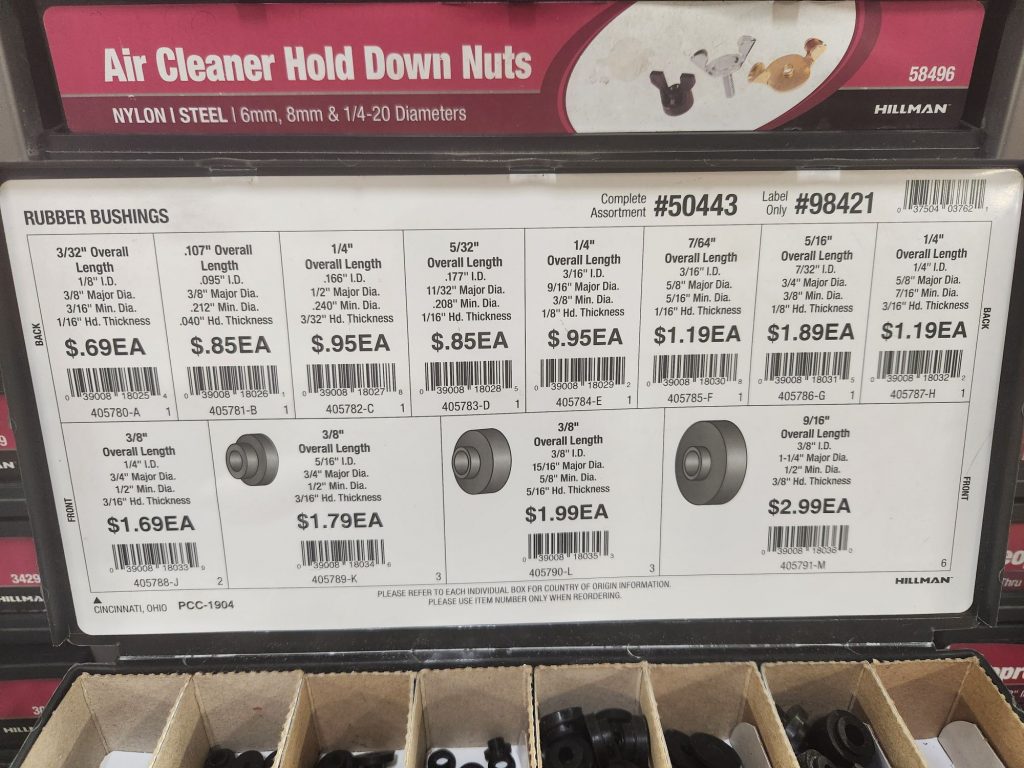
A quick spin over to the local Ace Hardware store and I was able to find a variety of Hillman rubber bushings on offer as potential replacements.
I selected Hillman part number 405784-E as the closest bushing with dimensions 1/4" overall length; 3/16" ID, 9/16" major dia.; 3/8" min. dia. and 1/8" Hd. thickness. I picked up 4 of them for $0.95 each. Depending on availability, others might find luck ordering something of similar size and dimension from purveyors like McMaster-Carr or Grainger.
[caption id="attachment_55834796" align="aligncenter" width="660"] The old (left) and the new (right).[/caption]
Back at home I inserted the smaller end into the hole of the frame and screwed the shoulder bolt and washer back in to hold the frame onto the typewriter chassis. It seemed an excellent fit and this part of the machine should be in good shape for the next few decades.
If this is the only repair you're making to your machine, I suggest you replace each one, one-at-a-time in turn. This will prevent you from needing to take apart more of the machine or removing the entire body shell to get them on and will speed up the replacement process. If you're doing it as a larger restoration, then just install them when you re-attach the body shell. For me, loosely attaching the two rear ones followed by the two at the front and then tightening/adjusting them all seemed to be the easier way to go.
If you're restoring your own SG1, I hope these details make your work and research a bit quicker and easier.
{
"type": "entry",
"published": "2026-03-01T22:51:54-08:00",
"summary": "Over the weekend I made a major push on beginning restoration of the Olympia SG1 standard typewriter I picked up this past month.\u00a0 One of the small issues I encountered was finding four crushed rubber bushings between the exterior typewriter shell and the main chassis at the four corners on the bottom of the machine. … <a href=\"https://boffosocko.com/2026/03/01/replacing-the-body-shell-rubber-bushings-on-an-olympia-sg1-typewriter/\" class=\"more-link\">Continue reading <span class=\"screen-reader-text\">Replacing the Body Shell Rubber Bushings on an Olympia SG1 Typewriter</span></a>",
"url": "https://boffosocko.com/2026/03/01/replacing-the-body-shell-rubber-bushings-on-an-olympia-sg1-typewriter/",
"featured": "https://boffosocko.com/wp-content/uploads/2026/03/Olympia-SG1-diagram-highlighted.jpg",
"category": [
"Typewriters",
"bushings",
"Olympia SG1",
"Olympia typewriters",
"typewriter restoration"
],
"content": {
"text": "Over the weekend I made a major push on beginning restoration of the Olympia SG1 standard typewriter I picked up this past month.\u00a0\n\nOne of the small issues I encountered was finding four crushed rubber bushings between the exterior typewriter shell and the main chassis at the four corners on the bottom of the machine.\n\n[caption id=\"attachment_55834794\" align=\"aligncenter\" width=\"660\"] This black rubber bushing is so smashed you almost can't see it above the silver screw head at the bottom of the typewriter frame. The typewriter's foot has been removed from the vacant screw hole just to the left of the bushing screw to provide better visibility.[/caption]\n\nThis is a common repair issue for the Olympia SM3 machines and one which can dramatically impair that typewriter's functionality after several decades. I expected this would be a common enough problem, so I searched a few fora, YouTube, and some specialty\u00a0 Facebook Groups to see how others had done the replacement and find the specs for the original part. Sadly none were forthcoming. Has no one written this up before? Perhaps because the issue isn't a huge problem from a functional perspective, no one has bothered?\n\nBut when you're doing a thorough restoration on a machine you plan to put into daily use, you go the extra mile. To that end, I thought I'd write up a few notes for those who encounter this in the future, particularly as I couldn't find quick sources on it the way one can for the SM3.\u00a0\n\nMy crushed rubber husks (now more like a brittle, friable plastic) were approximately 16mmOD x 4mm ID x 2 mm, but I wanted to do better than guessing the appropriate replacement. Fortunately our friend Richard Polt has a downloadable .pdf copy of the Olympia Spare Parts Catalog and Price List for Standard Typewriters Model SG1 (Jan. 1, 1961 edition) from the Ames Supply Company on his website. Pulling it up very quickly provided a diagram of the appropriate part on page 12 and indicated it to be part number 34280-5x.6. Scrolling ahead to page 61, one discovers that the part is called a \"spacing washer (rubber)\" whose original specs are listed as 5\u230012\u2300x4mm which originally listed for 11\u00a2. On a German manufactured machine this is indicating a 5mm inner diameter, 12 mm outer diameter, and thickness of 4mm.\n\n\n\nA quick spin over to the local Ace Hardware store and I was able to find a variety of Hillman rubber bushings on offer as potential replacements.\n\n\n\nI selected Hillman part number 405784-E as the closest bushing with dimensions 1/4\" overall length; 3/16\" ID, 9/16\" major dia.; 3/8\" min. dia. and 1/8\" Hd. thickness. I picked up 4 of them for $0.95 each. Depending on availability, others might find luck ordering something of similar size and dimension from purveyors like McMaster-Carr or Grainger.\n\n[caption id=\"attachment_55834796\" align=\"aligncenter\" width=\"660\"] The old (left) and the new (right).[/caption]\n\nBack at home I inserted the smaller end into the hole of the frame and screwed the shoulder bolt and washer back in to hold the frame onto the typewriter chassis. It seemed an excellent fit and this part of the machine should be in good shape for the next few decades.\u00a0\n\nIf this is the only repair you're making to your machine, I suggest you replace each one, one-at-a-time in turn. This will prevent you from needing to take apart more of the machine or removing the entire body shell to get them on and will speed up the replacement process. If you're doing it as a larger restoration, then just install them when you re-attach the body shell. For me, loosely attaching the two rear ones followed by the two at the front and then tightening/adjusting them all seemed to be the easier way to go.\n\nIf you're restoring your own SG1, I hope these details make your work and research a bit quicker and easier.\u00a0",
"html": "Over the weekend I made a major push on beginning restoration of the <a href=\"https://boffosocko.com/2026/02/02/1956-olympia-sg1-standard-typewriter/\">Olympia SG1 standard typewriter</a> I picked up this past month.\u00a0\n\nOne of the small issues I encountered was finding four crushed rubber bushings between the exterior typewriter shell and the main chassis at the four corners on the bottom of the machine.\n\n[caption id=\"attachment_55834794\" align=\"aligncenter\" width=\"660\"]<img src=\"https://boffosocko.com/wp-content/uploads/2026/03/wp-17724316421148620735029722440606-1024x768.jpg\" alt=\"View of the back corner underneath an Olympia SG1 typewriter featuring a crushed rubber washer between the body shell and the solid steel chassis of the typewriter. It look like it's less than a millimeter thick.\" width=\"660\" height=\"495\" /> This black rubber bushing is so smashed you almost can't see it above the silver screw head at the bottom of the typewriter frame. The typewriter's foot has been removed from the vacant screw hole just to the left of the bushing screw to provide better visibility.[/caption]\n\nThis is a <a href=\"https://boffosocko.com/2024/07/14/aggregated-resources-and-playlist-for-a-crash-course-on-the-olympia-sm3-portable-typewriter/#Olympia%20SM3%20Rubber%20Bushings%20Replacement\">common repair issue for the Olympia SM3 machines</a> and one which can dramatically impair that typewriter's functionality after several decades. I expected this would be a common enough problem, so I searched a few fora, YouTube, and some specialty\u00a0 Facebook Groups to see how others had done the replacement and find the specs for the original part. Sadly none were forthcoming. Has no one written this up before? Perhaps because the issue isn't a huge problem from a functional perspective, no one has bothered?\n\nBut when you're doing a thorough restoration on a machine you plan to put into daily use, you go the extra mile. To that end, I thought I'd write up a few notes for those who encounter this in the future, particularly as I couldn't find quick sources on it the way one can for the SM3.\u00a0\n\nMy crushed rubber husks (now more like a brittle, friable plastic) were approximately 16mmOD x 4mm ID x 2 mm, but I wanted to do better than guessing the appropriate replacement. Fortunately our friend Richard Polt has a downloadable .pdf copy of the <a href=\"https://site.xavier.edu/polt/typewriters/OlympiaSG1parts.pdf\"><em>Olympia Spare Parts Catalog and Price List for Standard Typewriters Model SG1</em></a> (Jan. 1, 1961 edition) from the Ames Supply Company on his website. Pulling it up very quickly provided a diagram of the appropriate part on page 12 and indicated it to be part number 34280-5x.6. Scrolling ahead to page 61, one discovers that the part is called a \"spacing washer (rubber)\" whose original specs are listed as 5\u230012\u2300x4mm which originally listed for 11\u00a2. On a German manufactured machine this is indicating a 5mm inner diameter, 12 mm outer diameter, and thickness of 4mm.\n\n<img src=\"https://boffosocko.com/wp-content/uploads/2026/03/Olympia-SG1-diagram-highlighted.jpg\" alt=\"Mechanical diagram of the parts pertaining to the body shell of the Olympia SG1. The rubber washer part number is highlighted in yellow.\" width=\"966\" height=\"612\" />\n\nA quick spin over to the local Ace Hardware store and I was able to find a variety of Hillman rubber bushings on offer as potential replacements.\n\n<img src=\"https://boffosocko.com/wp-content/uploads/2026/03/wp-17724316778851643970633342041167-1024x768.jpg\" alt=\"Photo of the various specifications of about a dozen rubber bushings from a display in the hardware store.\" width=\"660\" height=\"495\" />\n\nI selected <a href=\"https://amzn.to/4l2YNG8\">Hillman part number 405784-E</a> as the closest bushing with dimensions 1/4\" overall length; 3/16\" ID, 9/16\" major dia.; 3/8\" min. dia. and 1/8\" Hd. thickness. I picked up 4 of them for $0.95 each. Depending on availability, others might find luck ordering something of similar size and dimension from purveyors like McMaster-Carr or Grainger.\n\n[caption id=\"attachment_55834796\" align=\"aligncenter\" width=\"660\"]<img src=\"https://boffosocko.com/wp-content/uploads/2026/03/wp-17724317095074657823087389083679-1024x768.jpg\" alt=\"Comparison of the old bushings on the left with the new rubber bushings on the right separated by the shoulder bolts and washers in the middle.\" width=\"660\" height=\"495\" /> The old (left) and the new (right).[/caption]\n\nBack at home I inserted the smaller end into the hole of the frame and screwed the shoulder bolt and washer back in to hold the frame onto the typewriter chassis. It seemed an excellent fit and this part of the machine should be in good shape for the next few decades.\u00a0\n\nIf this is the only repair you're making to your machine, I suggest you replace each one, one-at-a-time in turn. This will prevent you from needing to take apart more of the machine or removing the entire body shell to get them on and will speed up the replacement process. If you're doing it as a larger restoration, then just install them when you re-attach the body shell. For me, loosely attaching the two rear ones followed by the two at the front and then tightening/adjusting them all seemed to be the easier way to go.\n\nIf you're restoring your own SG1, I hope these details make your work and research a bit quicker and easier.\u00a0"
},
"author": {
"type": "card",
"name": null,
"url": null,
"photo": null
},
"post-type": "note",
"_id": "47507191",
"_source": "2785"
}
{
    "type": "entry",
    "published": "2026-03-02T06:55:23.037837+00:00",
    "url": "https://cleverdevil.io/2026/my-wife-is-out-of-town-and-i-miss-her-ve",
    "syndication": [
        "https://cleverdevil.club/@jonathan/116158268937543869",
        "https://bsky.app/profile/cleverdevil.io/post/3mg2od5gjao2h"
    ],
    "content": {
        "text": "My wife is out of town and I miss her very much, but have also been reminded how much I miss running the ceiling fan in my bedroom \ud83d\ude02",
        "html": "<p>My wife is out of town and I miss her very much, but have also been reminded how much I miss running the ceiling fan in my bedroom \ud83d\ude02</p>"
    },
    "author": {
        "type": "card",
        "name": "Jonathan LaCour",
        "url": "https://cleverdevil.io",
        "photo": "https://cleverdevil.io/profile/photo"
    },
    "post-type": "note",
    "_id": "47506678",
    "_source": "10"
}
{
    "type": "event",
    "name": "\ud83d\uddd3\ufe0f The Level Up",
    "published": "2026-02-28T22:30:00-0500",
    "start": "2026-02-28T22:30:00-0500",
    "url": "https://martymcgui.re/2026/02/28/the-level-up/",
    "featured": "https://res.cloudinary.com/schmarty/image/fetch/w_960,c_fill/https://media.martymcgui.re/ab/5d/97/71/6c25e2c42ccba31a79d63e4aaf5190b0a320eb7d2fdca8c18435b8b3.jpg",
    "category": [
        "improv",
        "show"
    ],
    "location": {
        "type": "card",
        "name": "Magnet Theater",
        "url": "https://magnettheater.com/"
    },
    "content": {
        "text": "The Level Up is an indie improv showcase. Join us as we watch amazing New York indie improv talents gain XP on the Magnet stage, unlock new achievements, and reach new milestones. Or do comedy.\n\nCome support Michael as he dons his hosting-duties cap for three exciting indie teams!\nHALALRIOUS\nGOOD TOWEL\nDJ SOGGY BOTTOM\nI\u2019ll be playing with Michael and the rest of the Level Up!\nLooking forward to it! And to seeing you there!! (Yes, you. Come on out!!!)\nSaturday Feb 28th, 2026 @ 10:30pm\n\nMagnet Theater\n\n254 West 29th St (btwn 7th and 8th Ave.)\n\nNew York City, NY 10001\n\nTickets $10: https://magnettheater.com/show/tickets/60380/",
        "html": "<blockquote>\n<p>The Level Up is an indie improv showcase. Join us as we watch amazing New York indie improv talents gain XP on the Magnet stage, unlock new achievements, and reach new milestones. Or do comedy.</p>\n</blockquote>\n<p>Come support Michael as he dons his hosting-duties cap for three exciting indie teams!</p>\n<ul><li>HALALRIOUS</li>\n<li>GOOD TOWEL</li>\n<li>DJ SOGGY BOTTOM</li>\n</ul><p>I\u2019ll be playing with Michael and the rest of the Level Up!</p>\n<p>Looking forward to it! And to seeing you there!! (Yes, you. Come on out!!!)</p>\n<p>Saturday Feb 28th, 2026 @ 10:30pm<br />\nMagnet Theater<br />\n254 West 29th St (btwn 7th and 8th Ave.)<br />\nNew York City, NY 10001<br />\nTickets $10: <a href=\"https://magnettheater.com/show/tickets/60380/\">https://magnettheater.com/show/tickets/60380/</a></p>"
    },
    "author": {
        "type": "card",
        "name": "Marty McGuire",
        "url": "https://martymcgui.re/",
        "photo": "https://martymcgui.re/images/logo.jpg"
    },
    "post-type": "event",
    "_id": "47501500",
    "_source": "175"
}
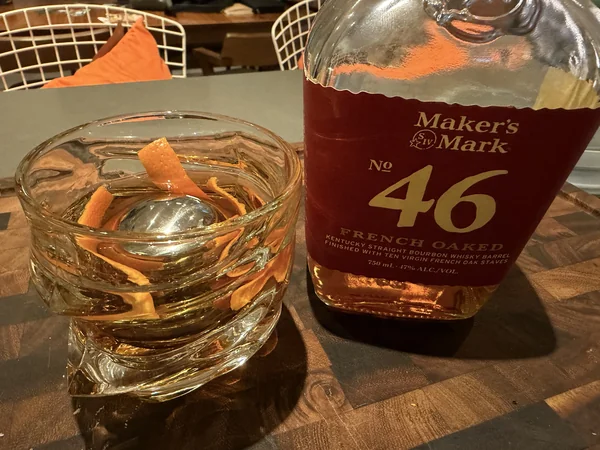
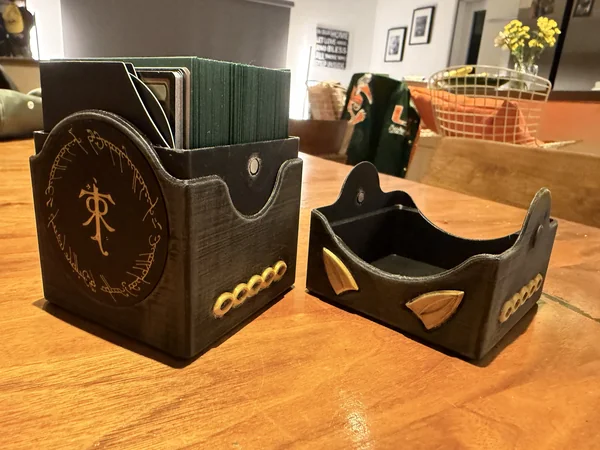
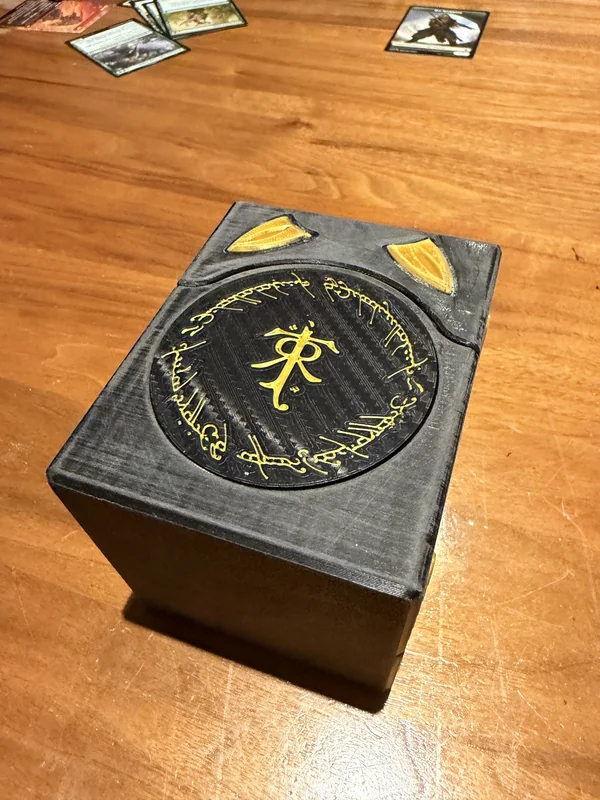
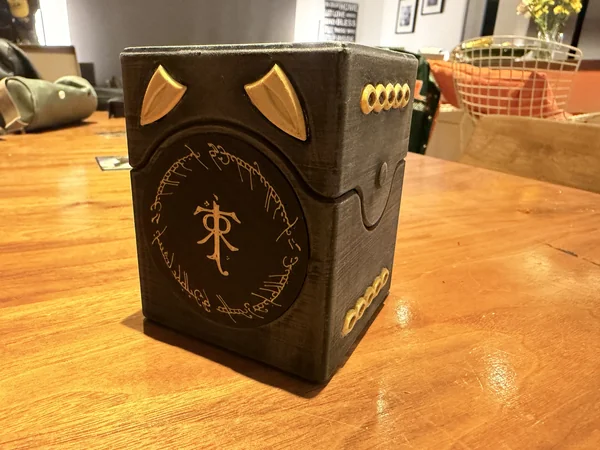
My wife and daughter are in Manhattan to catch a few shows, so my son and I are having a geeky boys weekend. I took him to learn how to play Magic at a local game store today and we are going to watch Lord of the Rings tonight. 🤓
{
    "type": "entry",
    "published": "2026-03-01T02:18:09.836825+00:00",
    "url": "https://cleverdevil.io/2026/my-wife-and-daughter-are-in-manhattan-to",
    "syndication": [
        "https://cleverdevil.club/@jonathan/116151516557969781",
        "https://bsky.app/profile/cleverdevil.io/post/3mfxoejek222k"
    ],
    "content": {
        "text": "My wife and daughter are in Manhattan to catch a few shows, so my son and I are having a geeky boys weekend. I took him to learn how to play Magic at a local game store today and we are going to watch Lord of the Rings tonight. \ud83e\udd13",
        "html": "<p>My wife and daughter are in Manhattan to catch a few shows, so my son and I are having a geeky boys weekend. I took him to learn how to play Magic at a local game store today and we are going to watch Lord of the Rings tonight. \ud83e\udd13</p>"
    },
    "author": {
        "type": "card",
        "name": "Jonathan LaCour",
        "url": "https://cleverdevil.io",
        "photo": "https://cleverdevil.io/profile/photo"
    },
    "post-type": "note",
    "_id": "47496740",
    "_source": "10"
}
{
    "type": "event",
    "name": "\ud83d\uddd3\ufe0f Bizzo at The PIT's March Madness!",
    "published": "2026-02-27T20:30:00-0500",
    "start": "2026-02-27T20:30:00-0500",
    "url": "https://martymcgui.re/2026/02/27/bizzo-at-the-pits-march-madness/",
    "featured": "https://res.cloudinary.com/schmarty/image/fetch/w_960,c_fill/https://media.martymcgui.re/ea/38/44/d9/09a5b7ee8ee16b24bb0d5fefde121118b3a410cd97f225b53323eb8e.jpg",
    "category": [
        "improv",
        "show"
    ],
    "content": {
        "text": "Bizzo is among 32 improv teams battling for a spot in the Sweet 16!\nPlease come out and \ud83d\udd25 scream for us \ud83d\udd25!!\nWho will take home prize money, a Mainstage residency, and March Madness glory? That\u2019s up to our judges and, of course, the audience! Follow the tournament from the start in our Qualifier Matches.\nFriday Feb 27, 2026 @ 8:30pm\n\nThe PIT Loft  - 154 W. 29th St., New York, NY, 10001\n\nTickets $15: https://thepit-nyc.com/events/march-madness-26-qualifiers/",
        "html": "<p>Bizzo is among 32 improv teams battling for a spot in the Sweet 16!</p>\n<p>Please come out and \ud83d\udd25 <strong>scream for us</strong> \ud83d\udd25!!</p>\n<p>Who will take home prize money, a Mainstage residency, and March Madness glory? That\u2019s up to our judges and, of course, the audience! Follow the tournament from the start in our Qualifier Matches.</p>\n<p>Friday Feb 27, 2026 @ 8:30pm<br />\nThe PIT Loft  - 154 W. 29th St., New York, NY, 10001<br />\nTickets $15: <a href=\"https://thepit-nyc.com/events/march-madness-26-qualifiers/\">https://thepit-nyc.com/events/march-madness-26-qualifiers/</a></p>"
    },
    "author": {
        "type": "card",
        "name": "Marty McGuire",
        "url": "https://martymcgui.re/",
        "photo": "https://martymcgui.re/images/logo.jpg"
    },
    "post-type": "event",
    "_id": "47495604",
    "_source": "175"
}


 I flushed the internals out with lacquer thinner and blew everything out with the air compressor the following day. I replaced the rubber body bushings and replaced two missing washers on the feet. Then I put everything back together making the appropriate adjustments as I went.
 Beyond this, it's ready to be in the regular rotation, but will be my primary desk machine for the near future.


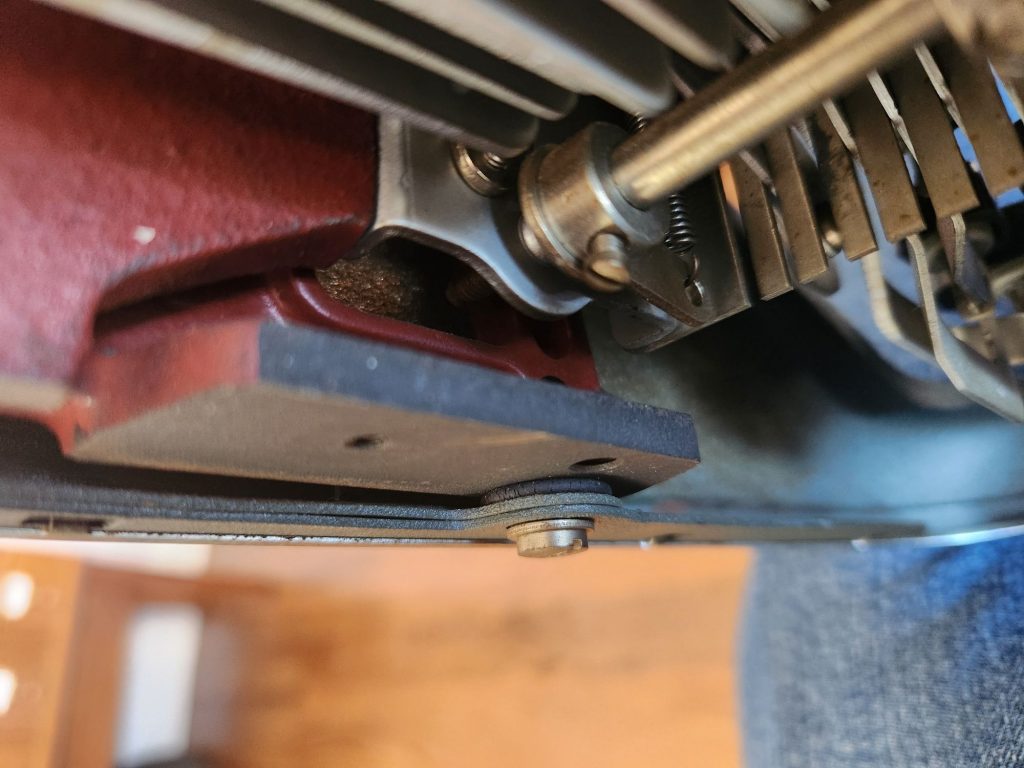 This black rubber bushing is so smashed you almost can't see it above the silver screw head at the bottom of the typewriter frame. The typewriter's foot has been removed from the vacant screw hole just to the left of the bushing screw to provide better visibility.[/caption]
This is a common repair issue for the Olympia SM3 machines and one which can dramatically impair that typewriter's functionality after several decades. I expected this would be a common enough problem, so I searched a few fora, YouTube, and some specialty Facebook Groups to see how others had done the replacement and find the specs for the original part. Sadly none were forthcoming. Has no one written this up before? Perhaps because the issue isn't a huge problem from a functional perspective, no one has bothered?
But when you're doing a thorough restoration on a machine you plan to put into daily use, you go the extra mile. To that end, I thought I'd write up a few notes for those who encounter this in the future, particularly as I couldn't find quick sources on it the way one can for the SM3.
My crushed rubber husks (now more like a brittle, friable plastic) were approximately 16mmOD x 4mm ID x 2 mm, but I wanted to do better than guessing the appropriate replacement. Fortunately our friend Richard Polt has a downloadable .pdf copy of the Olympia Spare Parts Catalog and Price List for Standard Typewriters Model SG1 (Jan. 1, 1961 edition) from the Ames Supply Company on his website. Pulling it up very quickly provided a diagram of the appropriate part on page 12 and indicated it to be part number 34280-5x.6. Scrolling ahead to page 61, one discovers that the part is called a "spacing washer (rubber)" whose original specs are listed as 5⌀12⌀x4mm which originally listed for 11¢. On a German manufactured machine this is indicating a 5mm inner diameter, 12 mm outer diameter, and thickness of 4mm.
This black rubber bushing is so smashed you almost can't see it above the silver screw head at the bottom of the typewriter frame. The typewriter's foot has been removed from the vacant screw hole just to the left of the bushing screw to provide better visibility.[/caption]
This is a common repair issue for the Olympia SM3 machines and one which can dramatically impair that typewriter's functionality after several decades. I expected this would be a common enough problem, so I searched a few fora, YouTube, and some specialty Facebook Groups to see how others had done the replacement and find the specs for the original part. Sadly none were forthcoming. Has no one written this up before? Perhaps because the issue isn't a huge problem from a functional perspective, no one has bothered?
But when you're doing a thorough restoration on a machine you plan to put into daily use, you go the extra mile. To that end, I thought I'd write up a few notes for those who encounter this in the future, particularly as I couldn't find quick sources on it the way one can for the SM3.
My crushed rubber husks (now more like a brittle, friable plastic) were approximately 16mmOD x 4mm ID x 2 mm, but I wanted to do better than guessing the appropriate replacement. Fortunately our friend Richard Polt has a downloadable .pdf copy of the Olympia Spare Parts Catalog and Price List for Standard Typewriters Model SG1 (Jan. 1, 1961 edition) from the Ames Supply Company on his website. Pulling it up very quickly provided a diagram of the appropriate part on page 12 and indicated it to be part number 34280-5x.6. Scrolling ahead to page 61, one discovers that the part is called a "spacing washer (rubber)" whose original specs are listed as 5⌀12⌀x4mm which originally listed for 11¢. On a German manufactured machine this is indicating a 5mm inner diameter, 12 mm outer diameter, and thickness of 4mm.
 A quick spin over to the local Ace Hardware store and I was able to find a variety of Hillman rubber bushings on offer as potential replacements.
 I selected Hillman part number 405784-E as the closest bushing with dimensions 1/4" overall length; 3/16" ID, 9/16" major dia.; 3/8" min. dia. and 1/8" Hd. thickness. I picked up 4 of them for $0.95 each. Depending on availability, others might find luck ordering something of similar size and dimension from purveyors like McMaster-Carr or Grainger.
[caption id="attachment_55834796" align="aligncenter" width="660"]
I selected Hillman part number 405784-E as the closest bushing with dimensions 1/4" overall length; 3/16" ID, 9/16" major dia.; 3/8" min. dia. and 1/8" Hd. thickness. I picked up 4 of them for $0.95 each. Depending on availability, others might find luck ordering something of similar size and dimension from purveyors like McMaster-Carr or Grainger.
[caption id="attachment_55834796" align="aligncenter" width="660"]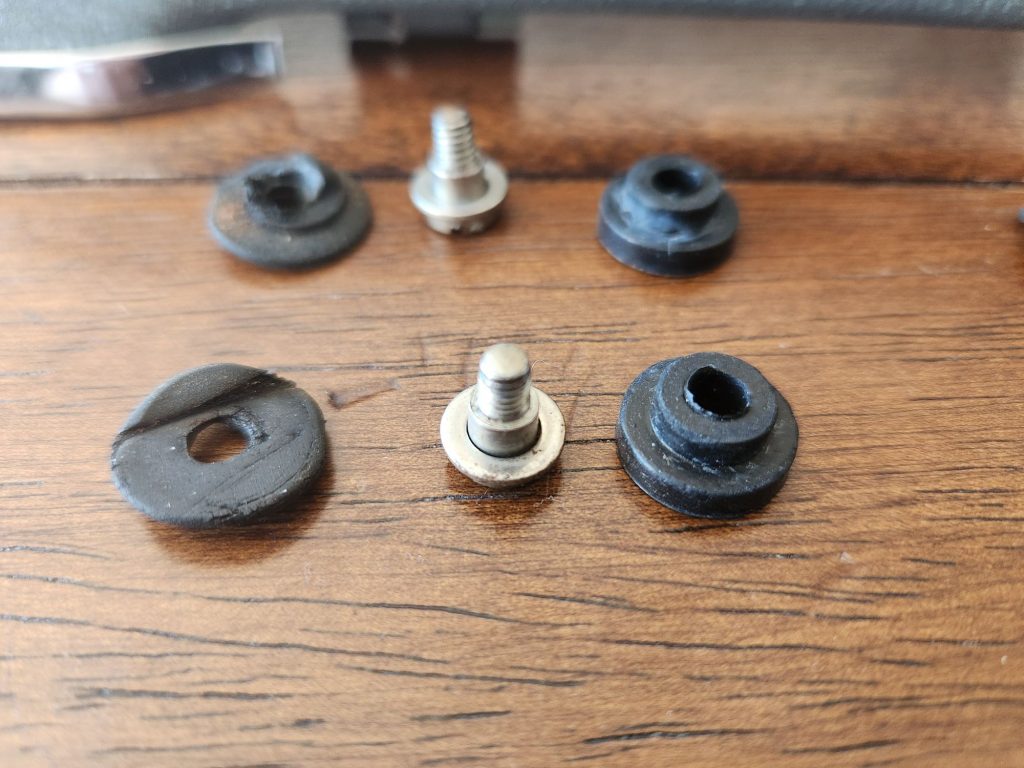 The old (left) and the new (right).[/caption]
Back at home I inserted the smaller end into the hole of the frame and screwed the shoulder bolt and washer back in to hold the frame onto the typewriter chassis. It seemed an excellent fit and this part of the machine should be in good shape for the next few decades.
If this is the only repair you're making to your machine, I suggest you replace each one, one-at-a-time in turn. This will prevent you from needing to take apart more of the machine or removing the entire body shell to get them on and will speed up the replacement process. If you're doing it as a larger restoration, then just install them when you re-attach the body shell. For me, loosely attaching the two rear ones followed by the two at the front and then tightening/adjusting them all seemed to be the easier way to go.
If you're restoring your own SG1, I hope these details make your work and research a bit quicker and easier.
The old (left) and the new (right).[/caption]
Back at home I inserted the smaller end into the hole of the frame and screwed the shoulder bolt and washer back in to hold the frame onto the typewriter chassis. It seemed an excellent fit and this part of the machine should be in good shape for the next few decades.
If this is the only repair you're making to your machine, I suggest you replace each one, one-at-a-time in turn. This will prevent you from needing to take apart more of the machine or removing the entire body shell to get them on and will speed up the replacement process. If you're doing it as a larger restoration, then just install them when you re-attach the body shell. For me, loosely attaching the two rear ones followed by the two at the front and then tightening/adjusting them all seemed to be the easier way to go.
If you're restoring your own SG1, I hope these details make your work and research a bit quicker and easier.